You can always send us your messages, comments or suggestions.
In one click, store and find all your favourite recipes.
Add this recipe >Organise all the necessary ingredients for the chocolate ice cream.
Place the milk over medium heat, without bringing to a boil. Make sure you are using whole milk.
Add the skimmed milk powder. Again, it is essential to use milk powder with 0% fat in order not to add any more fat.
Combine thoroughly with a whisk, making sure the powder does not accumulate at the bottom of the pan.
Gradually, the preparation should go up to 90°C. I recommend using a laser thermometer for this operation.
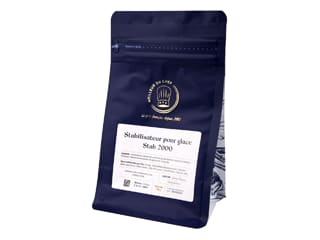
Combine the ice cream stabilizer and the sugar.
This step is essential: if both ingredients are added separately, it will create lumps in the preparation. This ensures a better incorporation.
Pour the sugar and stabilizer mix into the milk heated at 90°C.
Add the invert sugar (or trimoline) to the milk. Trimoline is used to bring a smoother texture to the ice cream.
Add the whipping cream. Using the laser thermometer, bring the preparation to a temperature of 90°C.
Pour the cocoa powder and chocolate couverture into a food mixer recipient.
Pour the hot milk preparation over the two chocolates.
Process the preparation for 2 or 3 minutes.
The preparation should be mixed very finely. This is essential to obtain the desired final results.
Leave the chocolate preparation to mature for at least 4 hours at room temperature.
Place a sheet of cling film in direct contact with the chocolate preparation, making sure there is absolutely no air between the surface of the preparation and the film. This will prevent any microbial growth. The maturing process is important to enhance the flavour and the action of the stabilizer. Never leave ice cream to mature in the fridge. This should always be done at room temperature.
4 hours later, the preparation should be roughly 20°C. Place the mix into an ice cream maker with a built-in freezer (such as the Nemox Gelato Chef 2200). Fill the recipient up to 3/4, but not up to the rim.
Place the motor unit and paddle back on the appliance.
Switch the freezer on, followed by the motor unit. The churning time should be about 35 or 40 minutes.
For the crispy centre: Place the Cara Crakine in the microwave for a few seconds to give it a smoother consistency that will be easier to work.
Make sure it doesn't melt or cook.
Scoop the Cara Crakine into a piping bag.
Pipe the Cara Crakine into the cavities of a silicone mould (such as Flexipan).
Cara Crakine is a paste that be consumed as is. It can also be used to create fillings for confectionery or pastry.
Gently tap the mould on your kitchen workbench to remove any air bubbles. Place in the freezer. It should take 15 or 20 minutes to set.
For the chocolate icing: Prepare the necessary ingredients to make the chocolate icing.
Melt the chocolate couverture in the microwave on medium power, in periods of 20 seconds to make sure the chocolate does not burn.
Melt the cocoa butter in the microwave until liquid.
Using a whisk, combine the three ingredients: the warm chocolate couverture, the liquid cocoa butter and the cold grape seed oil. For a more homogeneous consistency, I recommend using a hand blender.
When the churning process is complete, gently remove the recipient from the machine.
Transfer the chocolate ice cream into a piping bag.
Release the frozen crunchy disks from the mould.
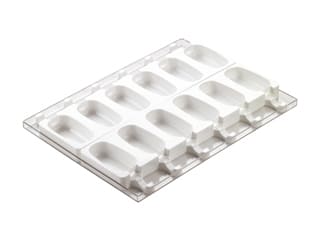
Fill the cavities of a silicone ice cream bar mould with the chocolate ice cream. This operation should be quick, so that the ice cream doesn't melt.
Using a spoon, push the preparation down to make it compact, then create a volcano shape.
Place the crunchy disks in the centre. Proceed quickly before the frozen disks start to melt. When eating the ice cream bars, the crunchy centre will be smoother than the ice cream.
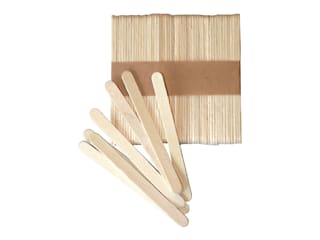
Insert the sticks in the mould, in the intended slots. The sticks should be placed in a perfect horizontal position.
Fill the cavities with the remaining chocolate ice cream up to the top.
Again, this operation should be done quickly.
Even the surface of the mould with a cranked metallic spatula. Place the mould in the freezer immediately. Leave the ice cream bars to set overnight.
The following day, release the ice cream bars from the mould, by lifting gently.
For the coating, there are several options.
First technique with caramelized almonds: Coarsely chop the caramelized almonds, then pass through a colander to remove all the tiny flakes.
Transfer the chopped almonds in a separate recipient.
Dip each ice cream bar into the caramelized almonds. The almonds should stick to the ice cream. Try to create a sort of coating around the ice cream. All sides should be coated with a generous amount of almonds.
Transfer the icing preparation into a deep, narrow recipient. Then dip one ice cream bar in the chocolate.
Remove the bar and let the chocolate excess drip off. Due to the temperature difference between the icing and the frozen bar, the icing will set really quickly.
When the icing is almost set, place the bar on a baking sheet lined greaseproof paper. Repeat the same operation with all the ice cream bars.
Second technique with Crispearls: Dip the bar in the chocolate icing.
Gently shake the bar to let the chocolate excess drip off, then place the bar in white chocolate Crispearls while the icing hasn't set yet.
Other possibility with Crispearls: Only dip the end of the bar in the white chocolate Crispearls. As shown in the photo, only the top of the bar is decorated with white Crispearls.
The white chocolate Crispearls can also be sprinkled on the ice cream bars. Possibilities are endless, just follow your imagination!
The leftover icing can be stored for later use. You'll just need to reheat it until liquid. For a more homogeneous consistency, I recommend using a hand blender.
Please login to post a review