You can always send us your messages, comments or suggestions.
In one click, store and find all your favourite recipes.
Add this recipe >Before starting this Chocolate & Raspberry Yule Log recipe, make sure you have organised the necessary ingredients for the Joconde biscuit.
In the stand mixer recipient, place the whole eggs...
... and the tant pour tant. If you don't have tant pour tant, simply combine 62,5 grams of almond powder and 62,5 grams of icing sugar.
Beat the ingredients, preferably with a stand mixer...
... until foamy and doubled in volume.
Turn off the mixer and reserve.
Place the egg whites in a separate bowl...
... and whip with a pinch of salt...
... until stiff peaks form.
Sift 18 grams of flour over the eggs and tant pour tant mixture.
Note: To make chocolate-flavoured Joconde biscuit, you will need to replace the 18g of flour with 12g of flour combined with 8g of cocoa powder.
Using a rubber spatula, combine gently until homogeneous.
Add the clarified butter...
... and incorporate it gently.
Pour the preparation over the beaten egg whites.
Combine gently...
... making sure the preparation does not collapse.
Pour the preparation on a baking sheet lined with greaseproof paper...
... and spread with a cranked spatula...
... to an even thickness to ensure regular cooking.
Bake at 180°C (gas 4) for about 10 or 12 minutes.
When cooked, flip the biscuit onto a rack or kitchen worktop...
... and the greaseproof paper by lifting while the biscuit is still warm.
Set aside and let cool. The Joconde can be prepared ahead and stored in the freezer. Before freezing, wrap it well in cling film so it doesn't absorb smells from other ingredients.
For the raspberry insert: Organise all the necessary ingredients.
Steep the gelatine sheets in cold water.
Place the raspberry purée and castor sugar in a saucepan.
Bring to a boil, stirring regularly. When it comes to the first boil, take away from the heat.
Drain the gelatine sheets with your hand...
... and add them to the hot purée.
Mix until the gelatine is completely dissolved.
Pour the hot purée into a baking sheet with raised edges so it cools down quickly. Do not refrigerate!
Beat the whipping cream until you obtain a whipped cream. Reserve in the fridge.
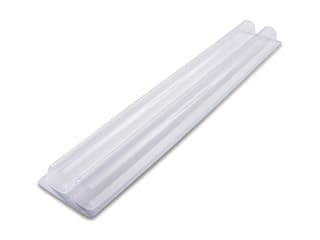
In the meantime, cut the insert mould to the appropriate dimensions. I used an insert mould with a length of 33 cm. If you have a longer plastic insert yule log mould, cut it to the right length with scissors. You can then assemble the shorter piece inside the other and use adhesive tape to stick.
When the raspberry purée is cold (between 25 and 30°C)...
... transfer into a recipient...
... and add 1/3 of whipped cream to facilitate the incorporation.
Combine with a whisk.
Pour the preparation over the remaining whipped cream...
... and combine gently with a rubber spatula.
Pour the raspberry mousse in one of the cavities of the insert mould...
... and place in the freezer.
For the chocolate mousse: Organise all the necessary ingredients.
Beat the cold whipping cream to obtain a whipped cream. Set aside.
Melt the dark chocolate over a bain-marie.
Once the pistoles have melted completely, remove from the bain-marie and set aside.
In a saucepan, pour the sugar and a little water (5 or 10 cl). Bring to a boil.
In the meantime, crack the whole eggs in the stand mixer recipient.
When the boiling intensity starts reducing, check the temperature with a laser thermometer. When the temperature is 121°C, take the pan away from the heat.
Beat the whole eggs in the stand mixer, then reduce the speed and gradually add the boiling sugar, pouring it against the inner side of the bowl.
Increase to maximum speed and continue beating until cooled down completely.
The preparation should be pale and doubled in volume (this is called 'pâte à bombe').
Combine the melted chocolate to the pâte à bombe.
Fold gently with a rubber spatula until homogeneous.
Make sure no chocolate chunks or no whole bits of pâte à bombe remain. Add the chocolate preparation to the cold whipped cream.
Combine all the ingredients...
... until homogeneous.
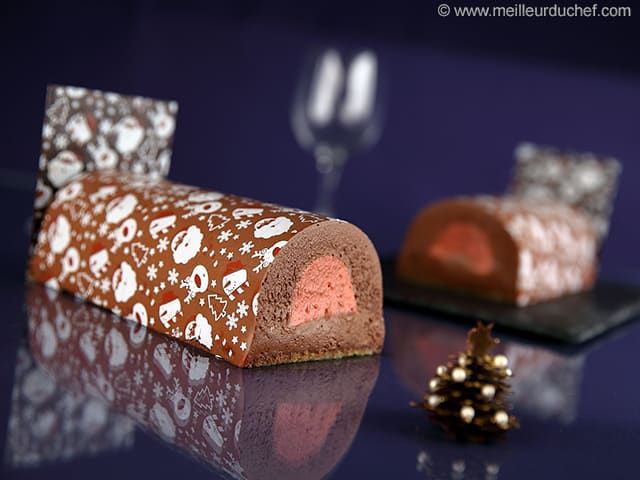
For this recipe, I used a transfer sheet to print a festive pattern on the surface of the log. You can use any pattern of choice for this recipe, but make sure you are using a transfer sheet made from polyethylene or acetate. Transfer sheets printed on greaseproof are not suitable for this recipe.
Line a yule log tin with a transfer sheet, cut to the right dimensions beforehand. Make sure the printed side is facing up.
I recommend cutting the transfer sheet so as to leave an extra 1cm on each side.
Scoop the chocolate mousse into a piping bag. The use of a nozzle is not necessary.
Fill the tin halfway up with chocolate mousse...
... then take the raspberry insert out of the freezer...
... and gently remove it from the mould.
Cut if to the same length as the yule log tin, if needed...
... and bury it gently in the chocolate mousse.
Cover the frozen raspberry insert with chocolate mousse...
... and fill up to the top.
Place a strip of Joconde biscuit, cut to the dimensions of the mould.
You can also use left-over pieces of biscuit from a previous recipe. This detail won't make any difference on the finished log, as long as the biscuit pieces are well lined up next to each other. Press down on the biscuit gently to make the chocolate mousse come up the sides a little.
Even the edges with a metallic spatula...
Using a brush, steep the biscuit with the syrup (made beforehand by combining the cane sugar syrup and kirsch). Place in the freezer for a few hours until set.
Up to this stage, the recipe can be prepared several days ahead and stored in the freezer.
Release from the mould: (start in the morning to serve for dinner)
Remove the mould from the freezer and place a yule log cake board on top.
You can watch the video included in this recipe to learn more about the delicate operation when you remove the transfer sheet from the log. The log should be completely frozen and the transfer sheet should be removed immediately after you take the log out of the freezer.
Flip upside down on your kitchen worktop...
...and release the yule log tin. It should come away easily, thanks to the plastic transfer sheet. If the ends of the log stick a little, slide a warm blade between the log and the mould.
The log is now nicely set on the cake board. Before moving onto the next operation, it is essential that the yule log is frozen. If needed, return the log to the freezer for about one hour. If the log is not cold enough, the transfer pattern won't print properly.
With the tip of a knife, lift a corner of the transfer sheet...
... and remove it in one stroke.
The pattern should now be printed on the surface of the frozen log.
Transfer sheets are great for chocolate and cookies, but they also work perfectly with other preparations like mousse, as long as they are frozen.
Place the log in the fridge, and let defrost slowly for a few hours.
I didn't think it was necessary since I chose a transfer sheet with a festive pattern, but you may decorate the surface of the log with any cake toppers of your choice.
This dessert should be served cold, but not frozen.
Enjoy this delicious dessert and have a sweet Christmas!
If you don't want to use gelatine sheets, which are of animal origin, you can replace them with agar-agar, a powder extracted from red seaweeds.
Recommended quantity: 1 gelatin sheet (2 grams) = 0.6 grams of agar-agar.
Please login to post a review