You can always send us your messages, comments or suggestions.
In one click, store and find all your favourite recipes.
Add this recipe >To make this recipe for Valentine's Day Gianduja & Praliné Mini Hearts, start by preparing the ingredients for the Gianduja insert. Depending on the type of Gianduja you're using, you may or may not need gelatin.
Gianduja Insert: Pour the Gianduja into a mixing bowl and melt it in the microwave in 20 to 30-second intervals, stirring between each melting step.
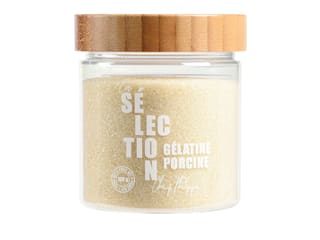
Mix the powdered gelatin with hydration water (tap water or mineral water) and let it hydrate for 15 minutes. Use this if you have a pasty Gianduja, not a solid one like the one I'm using.
Carefully mix the melted Gianduja...
...which should not exceed 45°C to prevent it from becoming disorganized and damaged.
If you are using gelatin, take a small amount of cream from the initial 150 g (about 20 to 25 g).
Warm this small amount of cream in the microwave for about thirty seconds.
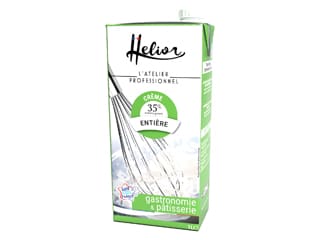
Meanwhile, whip the remaining cold heavy cream at 35% fat in an electric mixer until you get whipped cream.
Add the small amount of warm cream to the hydrated gelatin mass...
...and carefully mix using a spatula.
Pour cream with gelatine into the rotating mixer bowl. Note that the cream should no longer be hot but at room temperature.
Continue whipping the cream, being careful not to overwhip.
We obtain a soft whipped cream.
Pour half of this whipped cream into the melted Gianduja...
...and quickly mix with a whisk until the mixture becomes homogeneous.
Add the remaining whipped cream...
...and gently mix with the spatula maryse...
...until you get a smooth and homogeneous preparation.
Transfer this Gianduja preparation into a piping bag. Here, the use of a piping tip will not be necessary. Set aside.
Cover a tart ring Ø 16 cm with a stretched sheet of plastic wrap to close one side.
Place this stainless steel ring on a baking sheet (closed side down).
Pipe the Gianduja insert into the tart ring...
...and smooth the surface with a mini spatula.
Cover everything with a second sheet of plastic wrap, directly in contact with the Gianduja preparation.
Then smooth the surface of the insert with a dough scraper or with a small round cardboard cake support, to have a regular and flat surface.
We obtain this. Place it in the freezer.
Cocoa Sponge: Gather all the ingredients.
Prepare a bain-marie by boiling water in a saucepan. Place the mixer bowl on the saucepan (the water should be simmering).
Pour the whole eggs and granulated sugar into the bowl...
...and start whisking the mixture with a whisk to obtain a homogeneous mixture.
Continue whisking the mixture to prevent the eggs from coagulating prematurely until it reaches a temperature of around 45°C.
When the mixture reaches 45°C, place the bowl on the mixer base and beat the mixture with the whisk attachment until completely cooled.
The preparation should whiten, double in volume, and take on a creamy texture.
Sift the cocoa powder through a sieve onto a sheet of parchment paper.
Do the same with the flour.
Pour these sifted powders onto the egg and sugar mixture...
...and gently fold them in with a spatula maryse, making sure to lift the mixture from the bottom of the bowl to avoid the flour from descending and forming lumps.
Transfer this batter to a perforated baking sheet covered with a sheet of parchment paper...
...and spread it to a regular thickness of 0.5 cm using a cranked spatula.
Place the baking sheet in a preheated 180°C ventilated oven and bake for 10 to 12 minutes depending on the oven.
After baking, remove the baking sheet from the oven...
...and let it cool to room temperature.
Once the cocoa sponge has cooled, cover it with a sheet of parchment paper...
...and flip the whole thing.
Gently remove the baking sheet used to bake the biscuit.
We have our cocoa sponge. Set it aside.
Praline Crunch: Prepare the ingredients.
Pour the praline into a pastry bowl...
...and add the crushed feuilletine (crushed Gavottes crepes).
Mix these two elements together until you get a homogeneous praline crunch.
Take the cocoa sponge and flip it (the crust side should be on top).
Pour the praline crunch onto the biscuit...
...spreading it like this.
Spread the praline crunch on the cocoa sponge with the cranked spatula. There is no need to spread it over the entire biscuit; just provide a sufficient surface for cutting the 6 small hearts that will serve as bases for the desserts.
Using the heart-shaped cutter provided with the silicone mould, cut out the small biscuit hearts. Use the smaller side of this cutter, which has two sizes.
We get this result.
Place these hearts in the freezer.
Remove the Gianduja insert from the freezer and remove the top sheet of plastic wrap...
...as well as the bottom sheet of plastic wrap.
Run a knife blade between the stainless steel ring and the insert...
...to release the Gianduja disc. If the insert has softened too much, place it back in the freezer to firm up. It should be firm enough to move on to the next step.
Take the previously used cutter...
...and cut out the Gianduja insert with the smaller side.
Position the cutter as shown in the photo to minimize material loss. The insert should not be too firm or too soft to easily make the cut.
We get our 6 Gianduja hearts. Place them in the freezer until ready to use.
White Chocolate Tadoka Mousse: Prepare all the ingredients. Hydrate the powdered gelatin with hydration water for 15 minutes.
Heat the milk in a saucepan, adding half a Tadoka vanilla bean. This can be replaced with half a vanilla pod.
Pour the egg yolks into a pastry bowl...
...and add the granulated sugar.
Blanch the mixture with a whisk.
When the milk boils, pour it over the beaten eggs and sugar, stirring with a whisk.
Transfer everything back to the milk cooking pot.
Cook this mixture, like making custard, without exceeding 82°C to avoid getting scrambled eggs. The cream should thicken slightly without forming grains.
Add the hydrated gelatin mass to the boiling cream.
Place the white chocolate in a pastry bowl and pour the still boiling cream over it.
Let the chocolate sit in the cream to melt in contact with this hot preparation.
Then blend the preparation with a hand blender to obtain a perfectly smooth and homogeneous chocolate cream. Let it cool to room temperature.
Whip the cold heavy cream into a soft whipped cream.
Incorporate the whipped cream into the white chocolate preparation using the whisk until you get our smooth and homogeneous Tadoka white chocolate mousse.
Assembly: Place the silicone mold with 6 hearts on a baking sheet and pour the Tadoka white chocolate mousse into the cavities. If your mixture is soft, filling the mold will be easier, and unmolding will be perfect.
Place the Gianduja hearts in the center of the cavities, pressing them slightly into the mousse.
Cover the inserts with a thin layer of Tadoka white chocolate mousse.
Then close the cavities with the cocoa sponge hearts and praline crunch. The crunchy side should be in direct contact with the mousse.
We get this.
Cover everything with plastic wrap and place the mold in the freezer. This recipe can be prepared up to this point several days in advance.
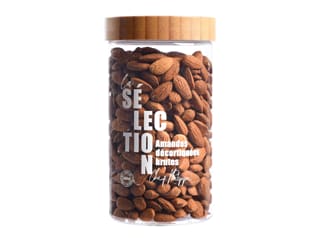
Old-Fashioned Praline: Prepare all the ingredients. You can roast the almonds and hazelnuts in a preheated oven at 150°C for 10 minutes. This is optional but recommended, as it will add flavor to our praline.
Pour the granulated sugar and water into a saucepan.
Bring this mixture to a boil and cook until it reaches 125°C. Here, the use of a digital thermometer is recommended.
When the syrup reaches 125°C, add the pre-roasted almonds and hazelnuts.
Carefully mix everything with a spatula to coat the dried fruits well with the boiling syrup.
Continue mixing; gradually, the sugar will crystallize by whitening and solidifying around the almonds and hazelnuts. This phenomenon is entirely normal.
Continue cooking until the sugar liquefies again and caramelizes.
In the end, we get caramelized almonds and hazelnuts. Be careful not to cook too much to prevent the praline from becoming bitter.
Transfer the caramelized dried fruits to a sheet of parchment paper.
Separate and spread the almonds and hazelnuts with the spatula before letting them cool. They should not cool in a block.
Break the cooled and caramelized almond and hazelnut pieces to place them in a blender.
Finely blend the preparation. The mixture will quickly become powdery.
Scrape the sides of the blender with the spatula...
...and blend again.
Gradually, the powder will turn into a paste. Scrape the container occasionally.
When the right texture is obtained, stop the blender. It will be difficult to achieve a very smooth praline with a household blender. Only professionals with powerful equipment can obtain a smooth praline.
Here is our "old-fashioned" praline because it has visible grains that will be felt when tasting.
Transfer this warm (or hot after blending) praline into a container for cooling. It cannot be used hot.
Finishing: On the day of serving, remove the silicone mold from the freezer and unmold the desserts. They should be frozen through for optimal unmolding.
Place the small hearts on a baking sheet covered with plastic wrap. This sheet will be placed on a rotating tray to facilitate flocking. Be sure to protect your work surface with sheets of parchment paper.
Shake the neutral velvet effect spray dye (white) until the ball clicks inside. Then spray it on the small desserts from a distance of at least 30 cm.
Turn the tray at the same time the dye is sprayed on all sides of the hearts.
Once the praline has cooled to room temperature, pour it into a pastry bag (without a tip).
Using the cranked spatula, place the desserts on their serving plate...
...and fill the cavity on their surface with the old-fashioned praline. For precise work, cut the end of the pastry bag to get a small opening that will control the flow of the preparation.
Take the presentation plate and tap it on the work surface from top to bottom...
...to smooth the surface of the praline. Optionally, perfect the edge with a wooden pick to get a neat result.
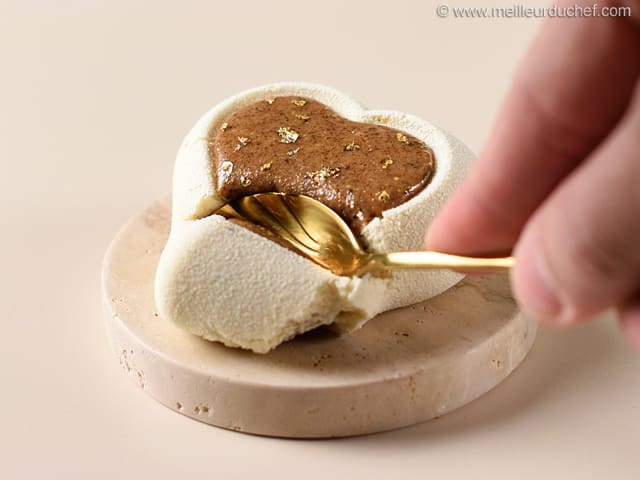
Finish the decoration by sprinkling a little gold glitter on the praline only. Keep these desserts refrigerated until ready to serve. Allow 2 to 3 hours for thawing at the center. Enjoy!
Please login to post a review