You can always send us your messages, comments or suggestions.
In one click, store and find all your favourite recipes.
Add this recipe >What would breakfast and dessert look like if puff pastry was never invented? Danish pastries, croissants, millefeuille... or even vol-au-vent! It appears that puff pastry was known as early as ancient Greece: they would integrate chunks of butter between layers of a dough to make it rise during baking. The recipe is likeky to have been perfected over time with the rolling and turning technique, particularly in France during the 17th century.
Homemade puff pastry (or 'pâte feuilletée').
Before starting this Puff Pastry recipe, make sure you have organised all the necessary ingredients.
In the stand mixer bowl, place the flour. If you don't have a stand mixer and want to make puff pastry from scratch, arrange the flour in the shape of a fountain on your workbench.
Add the salt...
... and water (at room temperature).
Place the recipient in the stand mixer...
... then fit with the dough hook...
... and work at medium speed for a few minutes. Once all the flour is incorporated...
... transfer the dough onto your kitchen worktop...
... and give it the shape of a ball. The dough ball should be quite compact. If you are not using a mixer, gather the flour with your fingers by drawing it into the water, until all the flour is incorporated.
You will end up with a compact ball.
Using a knife, score the top of the ball with a cross. The détrempe is now ready.
Wrap the dough ball in cling film...
... and refrigerate for at least 30 minutes.
Rolling and folding process: Flour your kitchen worktop...
... and place the détrempe in front of you.
With your fingers, squash the four corners of the ball.
Roll out the ball, maintaining the 'cross' shape.
The centre should be thicker.
In the centre, place the butter cold or taken out from the fridge 30 minutes before). Shape the butter into a rectangle that fits in the centre of the dough.
Fold the top corner of the dough over the butter.
Fold the opposite side (bottom corner) over.
Fold the right corner over...
... making sure the edges are sealed and regular.
Brush off the flour excess every time...
... then fold the left corner over.
Now that the butter is completely enclosed, bash the square with a rolling pin, in order to incorporate the butter into the dough. Make sure the square shape is maintained.
Roll out the square lengthwise...
... making sure the butter is not coming out of the dough. Shape the dough into a long rectangle, to a thickness of about 1cm.
Give the dough a quarter-turn...
... anti-clockwise. Flatten the corners a bit if necessary.
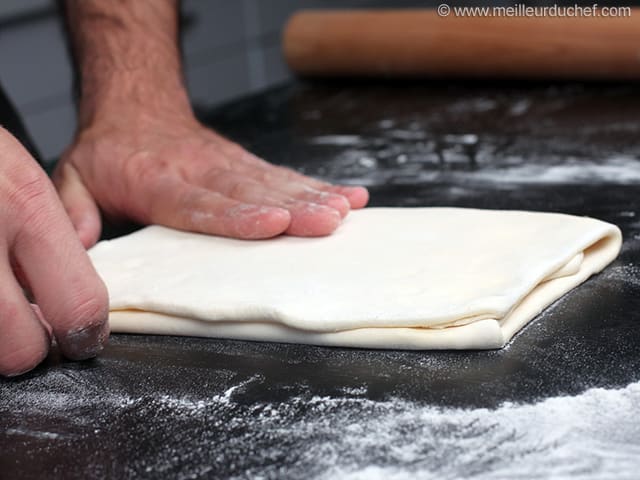
Fold the dough into three parts. Start by folding the right third over...
... then the left third.
Make sure the edges are sealed and regular.
Roll out the pastry again, lengthwise.
Give the dough a quarter-turn (anticlockwise) and fold into thirds again.
Start by folding the right third over...
... then the left one. Make sure the edges are sealed and regular.
Make a mark in the dough by sticking 2 fingers in. This means the dough has been folded 2 times. This easy tip is the best I found to always remember how many times the dough was folded, in the event you want to continue the folding process later or if someone else does.
This technique is most likely to be used in commercial kitchens where several batches of puff pastry are being made at the same time, but I encourage everyone to use it. Wrap the dough in cling film and refrigerate for at least 30 minutes. The first two folds are now done. Puff pastry needs to be folded 6 times.
Place the ball on a floured surface.
Roll out the pastry, lengthwise. Give the dough a quarter-turn (anticlockwise).
Important: Clockwise or anticlockwise, always follow the same direction.
Fold the dough into three parts. Start by folding the right third over...
... making sure to brush off the flour excess.
Then fold the left third over. Make sure the edges are sealed and regular.
Roll out the pastry again, lengthwise.
Give the dough a quarter-turn (anticlockwise)...
... and fold the dough into three parts. Start by folding the right third over...
... then the left one. Make sure the edges are sealed and regular.
Make a mark in the dough by sticking 4 fingers in. This means the dough has been folded 4 times.
This way, you will remember exactly how many folds have been made. As mentioned earlier, I highly recommend using this easy tip.
Wrap the dough in cling film and refrigerate for at least 30 minutes. The first four folds are now done. Puff pastry needs to be folded 6 times.
Place the dough on a floured surface.
Roll out the pastry, lengthwise.
Give the dough a quarter-turn (anticlockwise).
Fold the dough into three parts. Start by folding the right third over...
... then the left one. Make sure the edges are sealed and regular.
Roll out the pastry again, lengthwise.
Give the dough a quarter-turn (anticlockwise) again...
... and fold the dough into thirds.
Start by folding the right third over...
... then the left third.
Make sure the edges are sealed and regular.
Make a mark in the dough by sticking 6 fingers in. This means the dough has been folded 6 times and that the folding process is over.
The pastry is now ready to use. Beforehand though, wrap the dough in cling film and refrigerate for at least 30 minutes. Puff pastry can be stored for up to 3 or 4 days in the fridge, and for several weeks in the freezer. Wrap it in cling film for optimal storage conditions.
You can use homemade puff pastry for many different applications. Although puff pastry does take a lot of time to make, it is not difficult, as long as you follow the above instructions closely. I guarantee you won't want to go back to store-bought puff pastry!
Please login to post a review