You can always send us your messages, comments or suggestions.
In one click, store and find all your favourite recipes.
Add this recipe >Before starting this Black Forest Wedding Cake recipe, organise the necessary ingredients for the chocolate biscuit.
For the chocolate biscuit: (make the day before)
Cut the almond paste and place in the processor bowl.
Add the egg yolks.
Mix for 5 minutes...
... until there are no more lumps.
Remove the lid and set aside.
Melt the chocolate in the microwave, working in periods of 30 seconds to make sure the chocolate does not burn.
Beat the egg whites with a pinch of salt.
When the egg whites are stiff...
... add the castor sugar and beat again.
Pour the almond paste preparation into a large bowl.
Using a rubber spatula, scrape the sides of the bowl to get as much preparation as possible.
Add the melted chocolate...
... and combine gently with the spatula.
Add half of the meringue to the chocolate preparation.
Combine gently.
Add the remaining meringue...
... and combine until homogeneous.
Grease the largest ring (Ø 36cm) from the wedding cake mould kit, then place it on top of a baking sheet lined with greaseproof paper.
Pour the preparation inside the ring...
... and even the surface.
Bake for 20 minutes at 180°C (gas 4)...
... then reduce to 150°C (gas 2) and bake for a further 20 minutes.
When cooked, remove from the oven.
Insert the blade of a knife to check whether the biscuit is cooked. The blade should be dry when you take it out.
At this stage, you will need to repeat steps 2 to 24 in order to make a second chocolate biscuit. Given the large quantities of ingredients, it will be very difficult to make both biscuits at the same time.
When both biscuits have cooled down, gently remove the crust on top. It should come off easily.
Trim the edges...
... to obtain a regular round shape.
Place the medium ring on top of the chocolate biscuit, making sure it is well centred. Cut along the ring with a serrated knife.
You can use a rolling pin to press on the ring for a neat cut. Tap the ring with the end of the rolling pin to make sure you don't damage the smooth surface of the rolling pin.
This chocolate ring will be used for the bottom layer of the wedding cake.
Repeat the operation with the small stainless steel ring in order to cut a medium size chocolate ring. Use a serrated knife to cut the chocolate biscuit along the ring...
... and tap with the end of the rolling pin on the ring for a neat cut.
Remove the stainless steel ring. The medium chocolate ring will be used for the second level of the wedding cake, and the small chocolate disc will go to the top level. Repeat the above steps (68 onwards) with the second slab of chocolate biscuit. You should now have 2 large chocolate rings, 2 medium ones and 2 chocolate discs. Lay them flat in the freezer.
For the mascarpone chantilly cream: (make the day before)
Organise all the necessary ingredients.
Soak the gelatine sheets in a bowl filled with cold water.
In a saucepan, pour 150 grams of whipping cream...
... and castor sugar.
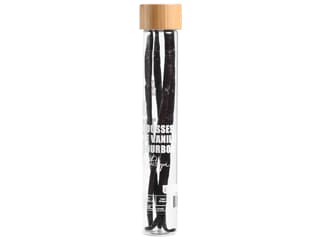
Split the vanilla pod lengthwise, then scrape the seeds out...
... and add to the preparation. Combine well with a whisk...
... and bring to a boil.
When the gelatine sheets are soft, strain and add to the hot cream. Whisk until the gelatine is completely dissolved.
Add the mascarpone...
...and the remaining whipping cream. Combine well with a whisk.
Using a hand blender, beat for 2-3 minutes.
Cover the bowl with cling film. Refrigerate overnight.
The following day: One by one, take the chocolate rings out of the freezer, and cut in half crosswise with a serrated knife.
To ensure an easier cutting operation, it is essential that the chocolate biscuits are frozen. Take them out of the freezer one by one, as they take no time at all to defrost.
Repeat the same operation with the chocolate discs.
You should now have 4 large chocolate rings, 4 medium ones and 4 chocolate discs. At this stage, the chocolate biscuits can be reserved at room temperature.
Take one large chocolate ring...
... and apply melted couverture chocolate on one side with a brush (technique known in French as 'chablonner). The chocolate will set very quickly on the cold biscuit.
Repeat the operation with one medium chocolate ring and one chocolate disc. These 3 chocolate-coated biscuits will serve as the base for each level.
Arrange the large chocolate ring around the largest stand from the mould kit, with the chocolate-coated side facing down. Take extra precautions, the biscuit is very fragile.
Place the large stainless steel ring around the stand.
Add some kirsch in the syrup...
... and brush the surface of the biscuit with syrup.
Repeat the same operation with the medium stand. Arrange the medium chocolate ring around it, chocolate-coated side facing down.
Place the medium stainless steel ring around the stand...
... and brush the surface of the biscuit with the syrup.
Repeat the same operation with the chocolate disc. Arrange the disc on the round stand, then place the small stainless steel ring around it.
Beat the cold whipping cream to obtain a whipped cream. Beforehand, combine 40 grams of ice cream stabiliser with castor sugar and add the whipping cream. This will prevent lumps.
When whipped, transfer the Chantilly cream into a piping bag. The use of a nozzle is not necessary.
Place the large mould (bottom level) on your worktop surface and pipe a thick lace of Chantilly cream on top of the biscuit.
Using a spatula, spread the preparation to an even thickness.
Scatter a few cherries in syrup and a few griotte cherries in liqueur (strained beforehand) on top of the cream.
Cover with another large ring of chocolate biscuit. Press gently with your fingers so the biscuit sticks to the cream.
Brush the surface of the biscuit with the syrup.
Repeat step 64 and pipe a thick lace of cream on top of the biscuit.
Spread and even the surface with a rubber spatula.
Scatter some syrup and liqueur cherries over the cream...
... and place a third chocolate ring.
Brush with syrup...
... then pipe a layer of Chantilly cream on top.
Even the surface with the spatula. Place a few liqueur cherries on top, then cover with the last ring of chocolate biscuit.
Brush the surface of the biscuit with syrup.
Pipe a thin lace of chantilly cream and even the surface with a palette knife.
Cover with cling film and reserve in the fridge.
Move on to the medium level. Pipe a thick lace of Chantilly cream...
... over the bottom chocolate biscuit.
Even the surface with a rubber spatula.
Scatter liqueur and syrup cherries over the cream.
Place a second ring of chocolate biscuit.
Brush the surface of the biscuit with kirsch syrup.
Pipe another layer of Chantilly cream...
... and even the surface.
Add the syrup and liqueur cherries over the cream...
... and so on...
... until you place the final ring of chocolate biscuit.
Gently press to get rid of any air bubbles.
Brush the surface of the biscuit with syrup.
Pipe a thin lace of Chantilly cream...
... and even the surface with the spatula.
Cover with cling film and reserve in the fridge.
Follow the same method for the top level.
Alternate between layers of biscuit, Chantilly cream, cherries...
... and another layer of biscuit and so on...
... making sure to brush the biscuit with syrup every time.
Then continue with a layer of cream...
... syrup and liqueur cherries...
... and biscuit steeped with syrup.
You should end up with 4 stacked levels...
... each including biscuit with syrup, Chantilly cream and cherries.
Finish with the last disc of chocolate biscuit.
Pipe a little Chantilly cream and even the surface. Cover with cling film and reserve in the fridge.
Assembling the wedding cake: Take the bottom level out of the fridge.
Remove the cling film.
Slightly heat the sides of the stainless steel ring with a blow torch...
... and release the ring by sliding it upwards gently.
Reserve in the fridge.
Repeat the same operation for the medium level...
... and the top level...
... slightly heating the sides of the stainless steel ring with a blow torch...
... and sliding it upwards gently to release it.
Reserve in the fridge.
Take the mascarpone Chantilly out of the fridge and beat in the stand mixer...
... until well whipped and homogeneous.
Using a palette knife...
... coat the sides of the bottom level with mascarpone Chantilly.
Repeat the same operation with the medium and top level.
Place the chocolate shaving in a large tray.
Coat the sides of the bottom level with chocolate shavings...
... simply applying them with your hands.
Set aside.
Repeat the operation with the medium level.
Make sure the sides are evenly coated with chocolate shaving, without any holes.
Place the medium level on top of the bottom one...
... making sure it is well centred.
Repeat the same method for the top level...
... and arrange it at the top, well centred.
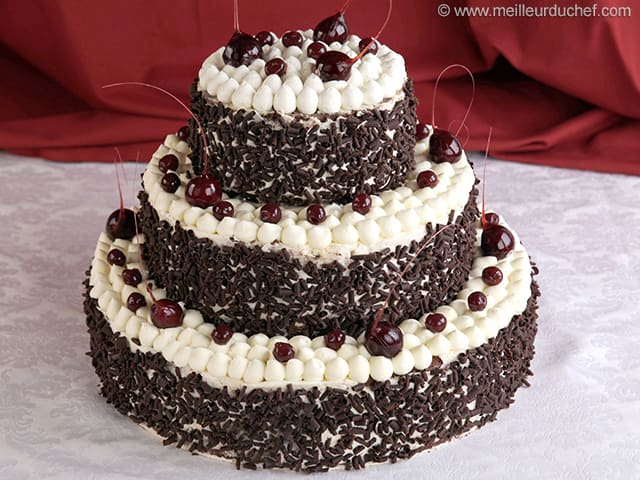
At this stage, your cake should look like this.
Scoop the rest of the mascarpone Chantilly cream into a piping bag fitted with a plain nozzle (5mm diameter).
On the flat surface of each level, pipe small drops of cream.
For the surface at the top, start piping drops of cream along the edge...
... gradually working your way towards the centre. Reserve in the fridge.
For the sugar-coated cherries: Organise all the necessary ingredients.
In a saucepan, pour the water first, followed by castor sugar.
Add the glucose syrup. Beforehand, I recommend placing it in the microwave for about 20 seconds until smooth and soft.
Cook the sugar until the temperature reaches 155°C. For this step, the use of a digital or laser thermometer is recommended.
Add some water-soluble red colouring. The amount of colouring varies according to the colour intensity you wish to obtain.
Combine.
When the sugar reaches 155°C...
... set aside a little so that the caramel thickens enough to coat the whole surface of the cherries.
Gently dip one cherry in the cooked sugar...
... holding the stem.
Slowly lift the cherry so that the sugar runs down and forms a thread.
When the sugar stops dripping, cut the thread to the desired length with scissors.
Let it cool down a little, then gently lay it on a Silpat silicone mat.
Repeat the operation with the other cherries, until you've made approximately a dozen.
It is important that you coat the cherries one by one.
When the cherries have cooled down, remove the stems...
... and move them to a vertical position. These sugar decorations should be prepared at the last minute.
Arrange the sugar-coated cherries on each level of the wedding cake.
To finish, bury a few liqueur cherries in the mascarpone Chantilly.
This spectacular dessert is now ready to serve!
I highly recommend the use of whipped cream stabiliser for this recipe. This gelling agent helps to stiffen whipped cream and ensures it holds its body and texture longer. Blend with the sugar before adding to the whipping cream.
Please login to post a review