You can always send us your messages, comments or suggestions.
In one click, store and find all your favourite recipes.
Add this recipe >To prepare this recipe for Black and White Christmas yule logs, start by gathering all the ingredients for the cocoa biscuit for the black yule log.
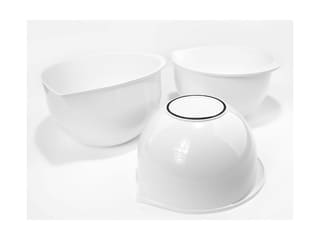
Cocoa biscuit (Black): Place the egg yolks and caster sugar in a mixing bowl...
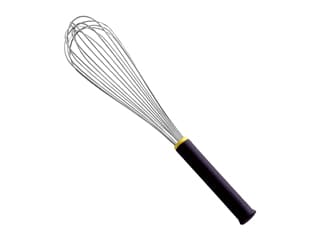
...and beat with a whisk until you no longer hear the sugar grains scratching the bottom of the bowl. The sugar must be completely dissolved.
Pour the egg whites into another mixing bowl...
...and whisk them into stiff peaks. I used a hand whisk for this recipe since the quantities are small. If you have an electric whisk, feel free to use it.
A stand mixer would be too large for this small quantity!
When the egg whites are foamy, add the caster sugar...
...and continue whisking without stiffening the whites too much.
Once the stiff peaks are ready, set them aside.
Add the flour to the bowl with the egg yolks and sugar mix...
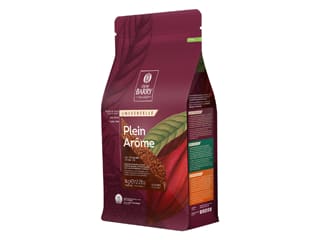
...along with the cocoa powder...
...and whisk vigorously until smooth.
Gently fold the stiff egg whites into the chocolate mixture...
...using a rubber spatula.
Add the melted butter, ensuring it is lukewarm or cooled (but not hot)...
...and fold it in gently with the spatula.
Pour the cocoa biscuit batter onto a perforated baking sheet lined with a silicone mat.
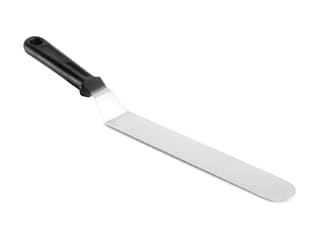
Spread the batter evenly into a rectangle (approx. 15 x 35cm) using a metal offset spatula.
Place the baking sheet in a convection oven preheated to 180°C and bake for 12 to 15 minutes. The baking time may vary depending on the oven.
When the baking is complete, remove from the oven...
...and allow the cocoa biscuit to cool to room temperature.
Once cooled (this is crucial), cover the biscuit with a sheet of parchment paper...
...and quickly flip the whole thing onto the baking sheet.
Carefully peel the silicone mat away from the biscuit, making sure it has cooled down first.
Set aside until ready to use.
Crunchy dark ganache (Black): Prepare the ingredients.
Pour the whipping cream into a small saucepan and bring to a boil.
Place the dark chocolate pistoles in a pastry bowl.
Pour the boiling cream over the chocolate...
...and let the chocolate sit for 1 minute so it starts melting.
Whisk the ingredients, starting from the centre and incorporating the cream and chocolate gradually.
Add the softened butter when the ganache reaches 55°C...
...and whisk until smooth and homogeneous.
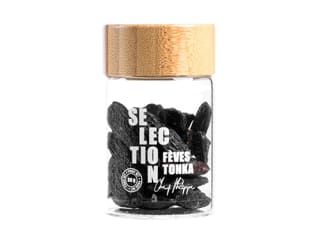
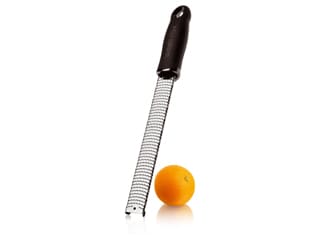
Using a Classic Microplane zester-grater, grate half a tonka bean over the chocolate preparation. Adjust the amount of tonka bean to taste.
Whisk again.
Add the crispy feuilletine flakes...
...and mix thoroughly with a spatula until you have a crunchy dark ganache. Set aside.
Take the Flexipan yule log mould designed for making two logs of 12.5cm or a single log of 25cm.
Trim the cocoa biscuit lengthwise and cut 3 strips measuring 12.5cm long...
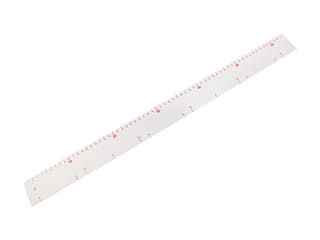
...and 5cm wide using a knife and a graduated ruler.
You should have 3 rectangles of cocoa biscuit measuring 12.5 x 5cm. Any leftover biscuit can be frozen for later use.
Spread the crunchy dark ganache over one of the cocoa biscuit strips...
...pressing it gently into place with a mini offset spatula and a scraper...
...to ensure an even thickness, as shown in the photo.
Place a second strip of cocoa biscuit on top of the first one...
...and press together.
Store in the fridge.
Dark chocolate mousse (Black): Prepare the ingredients.
Combine the butter and dark chocolate in a saucepan.
Melt over low heat, stirring with a rubber spatula...
...until smooth and homogeneous.
Ensure the mixture does not exceed 55°C.
Add the preheated water (also at 55°C) while mixing with a spatula.
Place the egg whites into the stand mixer bowl.
Begin whipping the whites using the whisk attachment, gradually adding the brown sugar.
Beat and stiffen the egg whites...
...as shown in the photo.
Transfer the chocolate preparation into a mixing bowl...
...and add the egg yolk.
Mix with the spatula until the yolk is fully incorporated.
Then add the beaten egg whites...
...and gently fold them in with a spatula...
...until smooth and homogeneous.
Transfer this dark chocolate mousse into a piping bag. No piping tip is needed.
Place the divisible log mould on a baking tray.
This mould is composed of three parts, including two removable silicone inserts (one solid, one perforated). The solid insert (see photo) will be used to create a single log.
The perforated insert is designed to fit into the central slot of the mould.
This configuration results in a mould with a length of approx. 25cm.
For this recipe, we want to make two small logs. Use the second removable silicone insert, which is solid, as a divider.
Place the insert into the slot...
...to divide the cavity into two equal sections.
This mould allows us to make two logs (either identical or different) with the same dimensions.
Pipe the dark chocolate mousse into one of the cavities.
Using a small offset spatula, spread the mousse along the sides of the cavity to eliminate air bubbles.
Insert the double-layered biscuit and crunchy ganache strip into the cavity, pressing it gently into the chocolate mousse. You may need to trim a bit to ensure it fits properly.
This is what the result should look like.
Pipe the remaining dark chocolate mousse over the biscuit...
...leaving a gap of 0.5cm on top for the third biscuit, which will serve as the cake base.
Smooth the surface of the dark chocolate mousse with the small offset spatula.
Place the final biscuit layer over the mousse...
...and press gently with your fingertips to ensure the mousse rises along the sides.
Smooth the surface using the small offset spatula.
Cover the entire surface with plastic wrap...
...and store in the freezer.
Dark chocolate Ganache (White): Prepare the ingredients.
Pour the whipping cream into a saucepan and add the tonka bean...
...grated with the Microplane zester-grater.
Bring to a boil.
Pour the hot cream over the dark chocolate in a mixing bowl...
...and whisk until the chocolate has completely melted.
Add the softened butter and continue whisking until the ganache is smooth and homogeneous. Set aside at room temperature.
Sponge cake (White): Place the whole eggs into the mixer bowl.
Start beating them with the whisk attachment while gradually adding caster sugar.
Whisk for about 5 minutes with an electric mixer until pale and doubled in volume. This process is referred to as "ribbon stage."
Transfer this preparation into a mixing bowl...
...and sift the flour over it.
Carefully fold in the flour until fully incorporated.
Pour this sponge batter into a baking tray lined with a silicone mat (or parchment paper)...
...and spread it evenly using a metal offset spatula.
Bake in a preheated oven at 180°C for 12 to 15 minutes, depending on your oven.
Once baked, remove the sponge cake from the oven...
...and allow it to cool to room temperature.
White chocolate mousse (White): Prepare all the ingredients. Start by mixing the powdered gelatin with the hydration water (tap water or mineral water) and let it hydrate for 15 minutes.
Pour the whole milk into a saucepan...
...and add a quarter of a Tadoka vanilla bean.
Heat the preparation until the vanilla bean is completely melted.
Cover the saucepan with cling film, and let it infuse for at least 20 minutes.
Meanwhile, cover the cooled sponge cake with a sheet of parchment paper.
Flip it over with a quick motion...
...and gently peel off the silicone mat. Like with the cocoa biscuit, it is crucial that the sponge cake is cool for this operation.
Trim one side of the sponge cake lengthwise with a knife and a ruler...
...and cut the sponge cake into rectangles, just like the cocoa biscuit...
...cutting three rectangles 12.5cm long and 5cm wide.
Transfer the dark chocolate ganache into a piping bag (without a nozzle). Cut a small opening (0.5cm) at the tip of the piping bag to control the flow.
Pipe the ganache over one of the strips of sponge cake.
Then place the second strip of sponge cake of identical size on top of the dark chocolate ganache. Press lightly and set aside in the fridge.
White chocolate mousse (continued): Once infused, place the saucepan back on the stove and bring the milk to a boil.
Remove the saucepan from the stove, add the hydrated gelatin...
...and stir vigorously with a spatula to dissolve it completely.
Pour the hot milk over the white chocolate in a bowl and start stirring...
...until smooth and homogeneous. The temperature must not exceed 35°C.
Pour the cold whipping cream (straight from the fridge) into the mixer bowl...
...and whisk until you get a soft whipped cream.
Gently fold the whipped cream into the white chocolate preparation...
...mixing carefully with a spatula.
Transfer the white chocolate mousse into a piping bag (no nozzle). As shown in the photo, the mousse will be semi-liquid, which is completely normal.
Cut the tip of the piping bag with scissors.
Pipe the white chocolate mousse into the second cavity of the divisible yule log mould.
Arrange the insert (made of two sponge cake strips and dark chocolate ganache) and bury it gently into the white chocolate mousse with your fingertips. To ease insertion, you may need to trim the insert a little.
Cover the sponge cake with the remaining white chocolate mousse.
Finish by placing the third rectangle of sponge cake (12.5 x 5 cm)...
... and press gently with your fingertips.
Cover everything with cling film, ensuring it is in contact with the surface.
Place the yule log mould in the freezer. This yule log can be made up to this stage several days in advance and stored in the freezer.
Glossy cocoa glaze (Black): Prepare all the ingredients. Hydrate the powdered gelatin with the hydration water for 15 minutes.
Pour the caster sugar into a saucepan.
Add the water.
Mix and bring to a boil.
Once boiling, ensure the sugar is completely dissolved before stopping the cooking process.
Place the cocoa powder in a mixing bowl...
...and pour the sugar syrup over it.
Whisk vigorously...
...until smooth and homogeneous.
Pour the whipping cream into a saucepan...
...and bring it to a boil.
Once boiling, remove the saucepan from the heat and add the hydrated gelatin.
Stir until the gelatin is fully incorporated.
Pour the hot cream into the chocolate preparation...
...and mix with a hand blender until the cocoa glaze is smooth and glossy.
Transfer the glaze into a flat food container...
...for optimal cooling results.
Once the glaze has cooled, pour it into a pitcher.
Mix the glaze again with a hand blender. Cover with cling film in direct contact with the surface and refrigerate.
Chocolate decorations: Melt the dark chocolate in the microwave in 20-30 second intervals, stirring every time. Make sure it doesn't exceed 45°C.
Pour the melted dark chocolate onto a polyethylene sheet...
...using an offset spatula.
Allow the chocolate to partially set. It should become slightly matte and no longer stick to your fingers.
Then cover the chocolate with a sheet of parchment paper...
...and wrap it around a rolling pin as shown in the photo.
Secure the roll with adhesive tape. Allow it to set at room temperature in a cool room (around 18°C), or refrigerate the rolling pin for 10-15 minutes to speed up the crystallization process.
White chocolate crunchy glaze (White): Gather all the ingredients.
Melt the white chocolate in the microwave in 20-30 second intervals, stirring every time to prevent burning. When fully melted, add the grapeseed oil (a neutral oil). Mix thoroughly.
Add the blanched and chopped hazelnuts. Mix again until a homogeneous glaze is achieved. Set aside.
Chocolate decorations (continued): Once the chocolate has set, remove the rolling pin from the fridge and unroll the chocolate cylinder. It may break into pieces, which is fine.
This is what the result should look like.
Cut the chocolate pieces into long, irregular shapes suitable for the size of the yule logs.
Dust the chocolate pieces with cocoa powder to create a light coating.
Remove the cocoa glaze from the fridge and peel off the cling film.
Bring the glaze to room temperature by warming it in the microwave, then mix with a hand blender to ensure a perfectly smooth consistency. Avoid creating air bubbles.
Remove the divisible yule log mould from the freezer and take off the cling film.
Flip the mould and carefully release the yule logs by carefully detaching the silicone mould.
The yule logs should be frozen through for optimal release results.
Separate the two yule logs by gently twisting them gently with your hands...
...and remove the silicone divider.
Place the Black yule log on a deep tray covered with a wire rack...
...and pour the glossy cocoa glaze in one smooth motion from one end of the log to the other. The yule log should be completely coated with glaze.
Let glaze excess drip down, then lift the log using two offset spatulas...
...and arrange on a serving platter.
This is what the result should look like.
Repeat the process for the White yule log, placing it on a wire rack set over a deep tray.
Pour the white chocolate crunchy glaze (at 35-40°C max) over the frozen log.
Once the glaze is partially set, lift the log with two offset spatulas...
...and arrange on the serving platter next to the Black yule log.
Finish: Decorate the Black yule log with cocoa-dusted dark chocolate chunks...
...making them overlap a bit, as shown in the photo. They will stick easily to the mirror glaze.
Using a piping cone, place one or two drops of neutral mirror glaze on the tips of the chocolate decorations.
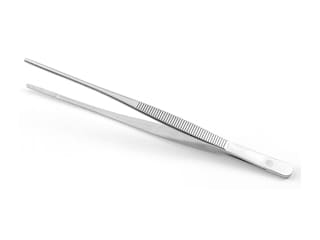
With precision tongs, add gold leaf flakes on top of the mirror glaze drops.
Also decorate the White yule log with one or two cocoa-dusted chocolate pieces. Use a bit of melted chocolate so they stick easily.
Arrange a macadamia nut coated in shimmering gold dust on top of the chocolate chunk.
The Black & White Christmas yule logs are ready. Store them in the fridge until fully defrosted, which will take 2 to 3 hours for optimal results.
Feel free to create the Black version, the White version, or both. Enjoy!
Please login to post a review