You can always send us your messages, comments or suggestions.
In one click, store and find all your favourite recipes.
Add this recipe >Before starting this Caramel Ingot Yule Log recipe, organise all the necessary ingredients for the milk and caramel chocolate mousse.
For the milk and caramel chocolate mousse: Beat the whipping cream...
... until you obtain a whipped cream, using an electric whisk. Reserve in the fridge.
Tip the castor sugar in a small saucepan. Add 5 cl of water, just enough to humidify the sugar.
Cook the sugar until the temperature reaches 121°C. For this step, the use of a digital thermometer is recommended.
Pour the cooked sugar over the eggs, while whisking at medium speed. Pour the cooked sugar along the inner side of the bowl to avoid splashes of hot sugar.
Increase the stand mixer speed and whisk until completely cold. This preparation is called 'pâte à bombe'.
In the meantime, melt the caramel chocolate couverture in the microwave, stirring every 30 seconds to make sure the chocolate doesn't burn.
Stir until completely melted and homogeneous.
Pour the melted chocolate (at room temperature) in the preparation...
... and fold gently.
Blend half of the whipped cream to the chocolate preparation to facilitate the incorporation...
... then add the mixture to the remaining whipped cream...
... and fold gently.
Transfer half of the preparation into a piping bag. The use of a nozzle is not necessary.
Assembling the cake: Stretch cling film over the narrowest side of the 18cm ingot cake frame. Make sure the film is stretched tight.
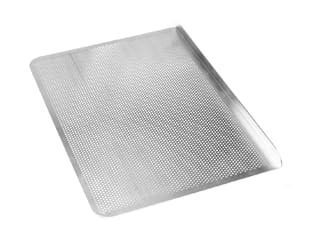
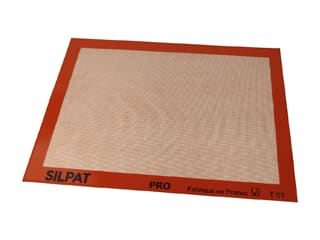
Arrange the ingot mould on a Silpat baking mat, placed on top of a Silichef XL perforated baking sheet. Fill with caramel mousse halfway up.
Sprinkle chopped pistachios and hazelnuts over the mousse. The quantity of hazelnuts and pistachios will vary according to your taste.
Cut a rectangle of Joconde biscuit (or sponge cake) to the dimensions of the ingot mould.
Place the biscuit rectangle over the pistachios and hazelnuts.
Cover with the rest of the caramel mousse...
... and finish with a second biscuit rectangle.
Cover with cling film and place in the freezer. It is best to make the cake the day before.
Tempering the chocolate: Melt the chocolate over a bain-marie, stirring gently. You can also melt the chocolate in the microwave, in periods of 20 seconds to make sure it does not burn.
When the chocolate has almost completely melted (only a few solid pistoles should remain), remove the recipient from the bain-marie. At this stage, the chocolate is roughly 40°C. The temperature should not exceed 45°C.
The chocolate will continue melting without exposing it to any source of heat. Let the temperature go down to 34-35°C.
Add the Mycryo cocoa butter. This cocoa butter is 100% natural. The supplied dispenser cup contains 10 grams, i.e. the necessary quantity for 1 kg of chocolate.
Sprinkle the cocoa butter over the chocolate at 34°C and combine.
Stop stirring for a little while for the butter to melt slowly.
Stir again and let the temperature go down to 31°C.
To monitor the temperature of the chocolate, the use of a thermometer is essential. I recommend using a laser thermometer, as this product provides accurate information without being in direct contact with food. The chocolate is now ready to use.
Place a transfer sheet (pattern of your choice) on your worktop surface, with the printed side facing up.
Pour the tempered chocolate on the transfer sheet...
... and spread into a thin layer using a cranked metallic spatula. Let the chocolate crystallize at room temperature. This should take only a few minutes.
When fully set (15 or 20 minutes later), flip the chocolate slab and gently detach the transfer sheet. Set aside in a cool room (do not refrigerate).
For the Gianduja chocolate icing: Organise all the necessary ingredients.
Hydrate the gelatin with 80 grams of water.
In a saucepan, pour 112 grams of castor sugar and water...
... and add the glucose syrup. Beforehand, I recommend placing it in the microwave for about 20 seconds until smooth and soft.
Place the saucepan on the stove. Bring to a boil. until the temperature reaches 103°C.
Add the unsweetened condensed milk...
... the sweetened condensed milk...
... and the rehydrated gelatin mass. It is important to mix the gelatin in a warm preparation so it dissolves quickly. Combine well until homogeneous.
Pour the hot preparation over the Gianduja Plaisir chocolate and the Ocoa dark chocolate.
Wait for a few seconds before stirring for the chocolate to start melting a little. Combine with a whisk...
... until all the ingredients are incorporated.
Finish mixing with a Bamix hand blender for a more homogeneous result...
... and to get rid of air bubbles.
Add a tablespoon of metallic gold colouring powder. The amount of colouring varies according to the iridescent intensity you want.
Mix again with the hand blender...
... until the result is metallic and homogeneous.
Remove the cake from the freezer. It should be completely frozen. Transfer on a rack placed on top of a deep tray.
Release the cake from the ingot mould. For an easier operation, slightly heat up the sides of the ring with a blow torch. Make sure the mousse doesn't melt. Slide the blade of a knife between the cake and the frame.
Gently remove the ring by sliding it upwards.
The cake should be frozen at this stage to ensure the icing operation is successful. If the surface of the cake melted a little during the release, return the cake to the freezer for about 30 minutes.
The icing prepared beforehand should be at a temperature of 28/30°C. Transfer the ingot cake on the rack and pour the icing in one go, from one end of the log to the other.
The surface and sides should be coated with icing. To create a thin layer of icing, even the surface carefully with a cranked metallic spatula. You won't need to do this if the icing is liquid enough.
The printed chocolate should now be perfectly set.
Break the chocolate into chunks with your fingers...
...and stick them on both sides of the cake. The chocolate should stick easily to the icing.
Both sides of the cake (lengthwise) should be coated with printed chocolate pieces.
Decorate the base of both narrow sides with chopped caramelised hazelnuts. Create a strip to a thickness of 0.5 cm.
Finish the decoration with a small piece of silver leaf...
... and arrange carefully on the surface of the cake with the tip of a knife.
Silver leaf sheets are very thin and volatile, so make sure there is no air draft in your kitchen.
Let your cake defrost in the fridge for about 2 or 3 hours before serving. Enjoy!
Please login to post a review