You can always send us your messages, comments or suggestions.
In one click, store and find all your favourite recipes.
Add this recipe >Before starting this Chocolate Christmas Bauble recipe, temper the dark chocolate. Place 2/3 of the chocolate (300g) in a bowl.
For the tempered dark chocolate: Melt the chocolate in the microwave and stir every 20 seconds to make sure the chocolate doesn't burn.
The chocolate should start to melt...
...continue stirring regularly until the chocolate is completely melted and reaches a temperature of 50°C. The use of a laser thermometer is recommended for this operation.
Add the rest of the dark chocolate (150g). This tempering technique is called the seeding method.
Combine with a rubber spatula to incorporate the hard chocolate quickly into the melted mass.
The pistoles will start melting in the melted chocolate...
... continue stirring until completely melted.
The temperature should reduce really quickly. The chocolate should go down to 31°C.
Get the Christmas bauble chocolate mould ready.
I am using a bronze iridescent colouring powder, but you could use gold or silver as well.
Using a brush, apply a thin layer of colouring powder inside each cavity. Make sure not to put any colouring around the cavities (the powder is extremely volatile).
This is what the result looks like. You can see there is a little bit of colouring around the cavity. With a dry cloth or paper towel, wipe around the cavity to clean the powder.
The dark chocolate is completely melted and has cooled down to 31°C (ideal temperature). It is important to maintain this temperature the whole time you're working with the dark chocolate. Place the chocolate into a tempering or dipping machine, or in a bain-marie (or use a heat gun if needed).
Place both parts of the mould on your kitchen worktop.
Fill the cavities of the first part with dark chocolate.
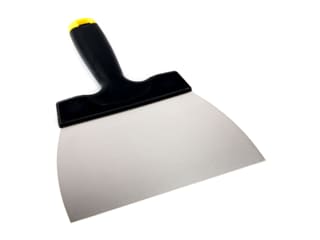
Gently tap the sides of the mould with a chocolate spatula to get rid of any air bubbles.
Flip the mould over the bain-marie to empty the cavities...
... and tap the mould with the spatula to let the chocolate excess drip off.
Scrape the surface of the mould with the spatula to create perfectly neat edges.
When the chocolate is no longer dripping, place the mould on a sheet of greaseproof paper and leave to crystallize in a cool room (17 or 18°C).
Repeat the above steps with the second part of the mould.
Gently tap the sides of the mould with the spatula to knock out any air bubbles.
Flip the mould to get rid of the chocolate excess...
... and tap the mould with the spatula.
Scrape the surface of the mould with the spatula to create perfectly neat edges.
This is what the result should look like this.
Place the mould on the greaseproof paper. Leave to set. The chocolate should crystallize quickly if the tempering was done correctly and if the room temperature is appropriate. The warmer the room, the longer the crystallization process will be. Do not refrigerate the chocolate. It is important not to try to speed up the crystallization process in a cooler room.
The moulds are ready and the chocolate is now crystallizing. Again, don't try to speed things up too much.
When the chocolate has crystallized, pour another layer of dark chocolate (which should still at a temperature of 31°C). The second layer will ensure the chocolate shells are thicker and more resistant. Fill the cavities completely.
Tap the mould with the spatula to get rid of air bubbles.
Flip the mould and tap with the spatula to get rid of the chocolate excess.
Scrape the surface of the mould with the spatula to remove any chocolate excess.
Place the mould back on the greaseproof paper and leave to crystallize.
Repeat the operation with the second mould. And leave to crystallize.
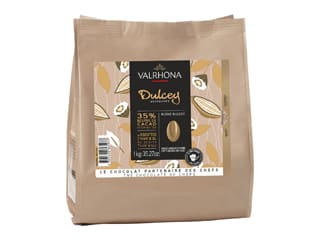
For the tempered Dulcey chocolate: Place the Dulcey chocolate in two separate bowls: two thirds (300g) in a big bowl and one third (150g) in a smaller bowl.
Melt 300 grams of Dulcey chocolate in the microwave in periods of 20 or 30 seconds, until the chocolate has completely melted and reaches 45°C maximum.
Place the remaining chocolate (150g) on a chopping board...
... and chop coarsely with a knife to create smaller chunks that will melt more easily.
The chocolate will slowly melt and increase in temperature.
Make sure you stir the chocolate at regular intervals until it reaches 45°C.
The chocolate is now melted, smooth and homogeneous.
Add the chopped Dulcey chunks. The temperature should decrease really quickly.
After a first stir, the temperature should be around 33°C.
Continue stirring until the chocolate chunks have melted completely.
The chocolate is now 31.4°C.
Combine again.
If you find the temperature takes too long to cool down, transfer the chocolate into another recipient.
Combine again with the spatula...
... until the preparation reaches 28 or 29°C.
The Dulcey chocolate is now ready.
Pour the tempered Dulcey chocolate in the cavities of the second mould, starting with the first half.
Gently tap the sides of the mould to knock out any air bubbles.
Flip the mould over the bowl...
... and tap the sides of the mould with the spatula to let the excess chocolate drip off.
Scrape the surface of the mould with the spatula.
Place the mould on a sheet of greaseproof paper.
Repeat the above steps with the second part of the mould and fill with tempered Dulcey chocolate.
Gently tap the sides of the mould with the spatula to knock out any air bubbles.
Get rid of the chocolate excess...
... and tap the mould with the spatula.
Scrape the surface of the mould with the spatula to create perfectly neat edges.
Place the mould on the greaseproof paper.
Leave to crystallize in a cool room (17 or 18°C).
When the chocolate has crystallized, pour another layer of chocolate (which should still at a temperature of 28/29°C) and fill the cavity. The second layer will ensure the chocolate shells are thicker and more resistant.
Tap the mould with the spatula to get rid of air bubbles.
Get rid of the chocolate excess, tapping with the spatula a little.
Scrape the surface of the mould with the spatula to remove any chocolate excess.
Place the mould back on the greaseproof paper and leave to crystallize.
Repeat the above steps with the second part of the mould and fill with tempered Dulcey chocolate.
Gently tap the sides of the mould to knock out any air bubbles...
... and flip the mould to get rid of the chocolate excess.
Scrape the surface of the mould with the spatula to remove any chocolate excess.
Place the mould back on the greaseproof paper and leave to crystallize.
For the tempered milk chocolate: Place the milk chocolate in two separate bowls: two thirds (300g) in a big bowl and one third (150g) in a smaller bowl.
Chop the small batch coarsely with a knife to create smaller chunks that will melt more easily.
Melt 300 grams of milk chocolate in the microwave, working in periods of 20 to 30 seconds. Make sure you stir the chocolate at regular intervals until the chocolate is completely melted...
... and reaches a temperature of 45°C maximum.
Continue stirring until melted.
The milk chocolate has melted and is now 44.6°C.
Add the milk chocolate chunks.
Combine with a spatula to incorporate the hard chocolate quickly into the melted mass.
The temperature should drop quickly (at this stage it is 32.4°C).
If you find the temperature takes too long to cool down, transfer the chocolate into another recipient...
... and continue to stir.
You can transfer the chocolate into a third recipient so the temperature drops even faster. You can also dip the base of the bowl in water at room temperature.
Combine again.
The milk chocolate should be melted and at a temperature of 28 and 29°C.
The third mould has a different shape. It can be placed on a piping bag holder for instance to maintain it flat.
Pour the tempered milk chocolate in the cavities of the third mould, starting with the first half.
Gently tap the sides of the mould to knock out any air bubbles.
Flip the mould over the bowl...
... and tap the sides of the mould with the spatula to let the excess chocolate drip off.
Scrape the surface of the mould with the spatula.
This is what the result should look like this. Place the mould on a sheet of greaseproof paper.
Repeat the above steps with the second part of the mould and fill with tempered milk chocolate.
Gently tap the sides of the mould with the spatula to knock out any air bubbles and even the surface.
Get rid of the chocolate excess, tapping with the spatula a little. Scrape the surface of the mould with the spatula to create perfectly neat edges.
Place the mould on the greaseproof paper. Leave to crystallize in a cool room (17 or 18°C).
The chocolate should crystallize quickly if the tempering was done correctly.
When the chocolate has crystallized, pour another layer of chocolate (which should still be at a temperature of 28/29°C) and fill the cavity.
Tap the mould with the spatula to get rid of air bubbles.
Flip the mould to get rid of the chocolate excess, tapping with the spatula a little.
Scrape the surface of the mould with the spatula to remove any chocolate excess and to create perfectly neat edges.
Place the mould back on the greaseproof paper and leave to crystallize. Repeat the operation with the second part of the mould.
Our Christmas bauble halves are now moulded. Ideally, leave the chocolates to crystallize overnight in a cool room (17 or 18°C) for an easy release.
Releasing the chocolates from the mould: The following day, twist one mould very gently to release the chocolate. The chocolate should come off easily.
Repeat the operation with the other moulds...
... as shown in the photo.
The chocolates are really easy to release from the mould...
... and the result is perfect!
We have two milk chocolate bauble halves...
... two Dulcey chocolate bauble halves...
... and two dark chocolate bauble halve. The bronze colour is now printed on the dark chocolate.
Assembling the shapes: Place a baking sheet in the oven preheated to 100°C (gas 1/4) for a few minutes, or heat the tray with a heat gun.
When the baking sheet is hot (about 50°C)...
... rub one half bauble on it to slightly melt the rim. For this recipe, I am using a chocolate handling glove to avoid leaving fingerprints on the surface of the bauble.
Assemble two halves together...
... as shown in the photo.
Place the whole bauble on a stand to keep it stable and leave to set. You can use a cooling spray around the rim so the chocolate sets instantly and the joint is sealed.
Heat the baking sheet again, as you will see it will cool down quickly.
Rub one dark chocolate half bauble on it to slightly melt the rim...
... for a few seconds only.
Assemble the two halves together, as shown in the photo.
The dark chocolate whole bauble is ready. Leave to crystallize.
I chose not to assemble the two parts of the Dulcey chocolate bauble. We're going to coat it with gold colouring powder.
Apply a thin layer of gold powder with a brush.
Repeat the operation with the other half.
Remove the colouring excess with the brush.
The result should be as shown in the photo. I used the Dulcey chocolate bauble as a candy box: fill the base with chocolates and use the other half as a lid.
Trim the seal of the milk chocolate bauble with a knife to remove any imperfections (I used a chocolate glove to make sure the bauble doesn't melt in contact with my fingers).
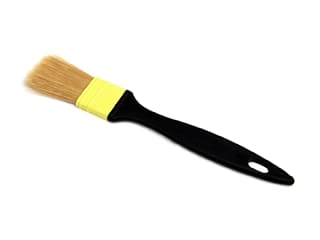
Using a pastry brush, remove the small chocolate shavings created by the trimming operation.
Apply a thin layer of bronze colouring powder on the surface of the chocolate with a brush.
Remove any colouring powder excess.
This is what the result should look like.
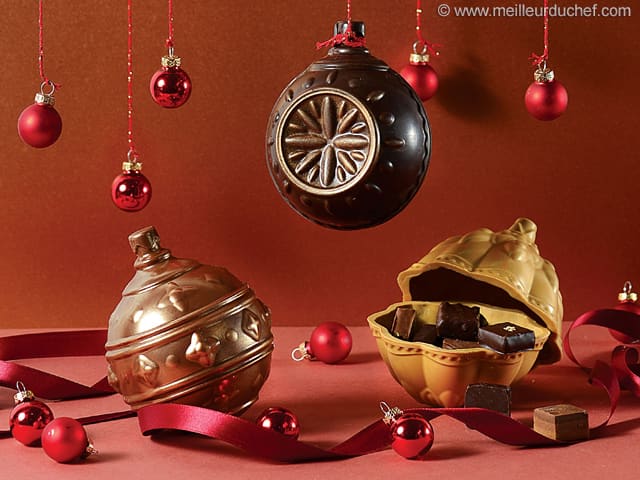
The three chocolate baubles are now finished. The dark chocolate bauble is coated with bronze iridescent colouring (applied directly inside the mould before pouring the chocolate). The milk chocolate bauble is coated with bronze iridescent colouring (applied with a brush after crystallization). The Dulcey chocolate bauble is coated with gold iridescent colouring (applied with a brush after crystallization). The combinations of chocolates and colourings are endless: you can use other types of chocolates such as the Ruby pink chocolate or white chocolate coloured with a fat-soluble colouring. They can be gifted to your guests or used as edible ornaments, hung with a string on the Christmas tree for instance. Enjoy these delicious Christmas chocolates!
Please login to post a review