You can always send us your messages, comments or suggestions.
In one click, store and find all your favourite recipes.
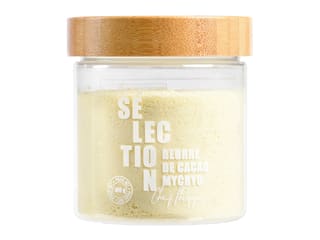
Add this recipe >Before starting this Chocolate Bunny recipe, organise all the necessary ingredients. We're going to follow the tempering method using Mycryo cocoa butter. You will need 1% of the total weight of the dark chocolate used in Mycryo cocoa butter.
For the chocolate eyes: Melt the dark chocolate in the microwave, stirring every 30 seconds to make sure the chocolate doesn't burn.
Continue the melting process until the temperature reaches 45°C to 50°C. Make the chocolate doesn't exceed 50°C. The use of a laser thermometer is recommended for this operation.
Stir the chocolate constantly with a rubber spatula until the temperature goes down to 35°C.
Add the Mycryo cocoa butter when the chocolate reaches 35°C.
Combine gently with a spatula until the Mycryo cocoa butter is completely melted. Then continue stirring until the temperature goes down to 31°C.
When the chocolate is at 31°C, it is ready for use. The chocolate should be kept at that same temperature the whole time you're using it (in a bain-marie or in a melting machine...).
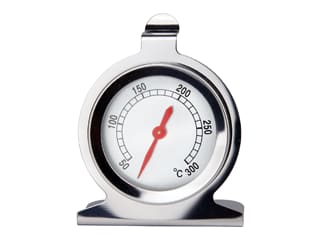
Transfer the tempered dark chocolate in a piping bag and close the top of the bag. You can also keep the chocolate in an oven preheated to 30°C. I recommend using an oven thermometer to monitor the temperature.
We're going to start with the eye pupil. Melt a small amount of white chocolate in the microwave for a few seconds (just enough to fill a small decorating bag). Pipe a drop of white chocolate at the bottom of a half sphere silicone mould. Temper 60 grams of white chocolate with 1% Mycryo cocoa butter (i.e. 0.6g) for the preparation of the eye globe. The ideal temperature for use is 28 or 29°C. Store the tempered white chocolate in the oven for a later use (step 16).
When the drop of white chocolate has fully crystallized, take the dark chocolate out of the oven and pipe a larger drop over the white centre.
Tap the mould on the workbench so the chocolate spreads evenly and covers the white chocolate drop...
... and leave to crystallize.
When the dark chocolate has crystallized, repeat the operation with milk chocolate. Temper the milk chocolate using the same method with Mycryo cocoa butter. Melt the chocolate and add the Mycryo cocoa butter when the temperature is 35°C. The chocolate should cool down to 29°C before use. Pipe a larger drop of milk chocolate over the crystallized dark chocolate...
...and tap the mould on the workbench so the chocolate spreads evenly and covers the dark chocolate.
Leave to crystallize at room temperature (or in the fridge for a few minutes).
Take the white chocolate out of the oven and fill the cavity up to the top.
Repeat for all cavities.
Tap the mould on the workbench so the chocolate spreads evenly.
This is what the result should look like at this stage.
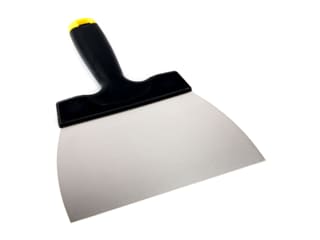
Scrape the surface of the mould with a chocolate spatula...
... and leave to crystallise at room temperature. Set the eyes aside until the end of the assembly stage.
For the cup, hat and bunny: We're going to temper the chocolate using a different technique: the seeding method. The result will be identical. It is up to you which method you want to use. Prepare the ingredients and divide each type of chocolate into two portions: 2/3 and 1/3. For 600 grams of chocolate, you will need to divide it into 400 and 200 grams.
Chop 1/3 of the chocolate with a knife. These chocolate chunks will melt faster than the chips.
Melt 2/3 of the chocolate in the microwave, stirring every 30 seconds to make sure the chocolate doesn't burn.
Repeat the operation until the chocolate has completely melted and the temperature reaches 50°C (maximum).
When the chocolate has completely melted, add the chopped chocolate chunks. This will allow the chocolate to cool down faster.
Stir gently with the spatula until the chocolate chunks have melted and incorporated completely.
The temperature should reduce quickly. The thermometer is showing 34°C after stirring briefly.
Continue stirring until the temperature reaches 31°C, which is the ideal temperature for use. Keep the chocolate at this temperature during the whole recipe in the oven preheated to 30/31°C.
Transfer the tempered chocolate into a piping bag...
Cut the tip of the bag with scissors to create a small hole.
Fill the cavities of the 3D Magic Bunny mould with tempered dark chocolate. We're going to start with the hat.
The result should be as shown in the photo.
Tap the thermoformed mould on the workbench to even the surface of the chocolate.
Tap the sides of the mould with a chocolate spatula to knock out any air bubbles.
This is what the result should look like. Leave to crystallize in a cool room (do not refrigerate).
Repeat the operation with the rest of the hat. Fill the cavity with tempered dark chocolate.
Tap the sides of the mould with the chocolate spatula to knock out any air bubbles.
Flip the mould over the bowl and get rid of the chocolate excess. Tap the mould with the spatula to let the excess chocolate drip off. Scrape the surface with the spatula and place the mould on a sheet of greaseproof paper.
Repeat the same operation with the other half of the mould.
Tap the mould with the spatula to even the surface...
... and flip the mould over the bowl. Tap with the spatula to get rid of the chocolate excess.
Scrape the surface of the mould with the spatula and place the mould on a sheet of greaseproof paper. Leave to crystallize. The chocolate should crystallize quickly if the tempering was done correctly.
When the chocolate has crystallized, repeat the operation and pour a second layer of tempered chocolate. Two layers of chocolate will ensure the piece is solid enough to be released from the mould without breaking.
This is what the result should look like at this stage. If for some reason you don't have enough chocolate to fill the cavity completely, rotate the mould in your hands so the chocolate reaches the rim of the cavity.
Flip the mould over the bowl and tap with the spatula to get rid of the chocolate excess.
Scrape the surface with the spatula and place the mould flat on a sheet of greaseproof paper.
Repeat the operation with the other half of the mould. I used an egg carton to maintain the mould stable and horizontal.
Gently tap the sides of the mould with the spatula to knock out any air bubbles.
Flip the mould over the bowl and tap the sides with the spatula...
... then scrape the surface for a neat finish.
Place the mould back on the greaseproof paper and leave to crystallize.
Repeat the operation with the rest of the hat and pour a second layer of tempered chocolate.
Tap the sides of the mould with the spatula...
... then flip and tap the sides to let the excess chocolate drip off.
Scrape the surface of the mould and arrange it on greaseproof paper. Leave to crystallize.
Repeat the operation with the other halves.
Tap the sides of the mould with the spatula...
... and let the excess chocolate drip off.
Scrape the surface of the mould with the spatula...
... and place the mould on greaseproof paper. Leave to crystallize. Continue with the mould for the bunny's head, shown in the photo on the left. The method is identical. You will need to pour two layers of tempered chocolate for an easier release. Continue with the mould for the bunny's ears: this time we don't want an empty chocolate shell but a filled chocolate piece.
When the chocolate has crystallized completely, scrape the surface of the mould with the spatula to remove any chocolate excess.
If the tempering was done correctly, the chocolate shapes should come off easily. Slightly twist the mould to facilitate the release if needed.
This is what the result should look like. Set aside.
Repeat the operation with the hat mould. Scrape the surface of the mould with the spatula to remove any chocolate excess.
Flip upside down on your kitchen worktop...
... and release the chocolate piece (it should come off easily).
The result should be as shown in the photo.
Repeat the operation with the other half of the hat...
... and release from the mould onto the greaseproof paper sheet.
All the chocolate elements are ready: the two halves for the hat, head and ears and the top of the hat. If tempered correctly, the chocolate should be glossy.
Place a baking sheet in the oven preheated to 100°C (gas 1/4) for a few minutes. When the tray is hot, place it on your workbench and use it to melt the rim of both hat halves so you can assemble together. Make sure the temperature of the baking sheet doesn't exceed 60 or 70°C. I recommend using fabric gloves to avoid leaving fingerprints on the surface of chocolates.
Assemble the two chocolate pieces together...
... and arrange the whole piece flat on greaseproof paper. Leave to crystallize.
When the chocolate piece has crystallized, pipe a spiral of melted dark chocolate on the top of the hat (where the diameter is the smallest).
Stick the hat border over the melted chocolate. Make sure the round piece is well centred. Leave to crystallize.
Pipe a drop of melted chocolate on the base of the ears...
... and stick the ears on top of the head.
Use cooling spray so the chocolate sets instantly and both parts are fixed together.
Pipe a small drop of melted chocolate at the base of the ears to make sure they are well sealed (prefer the back of the ears so it is not visible).
Use cooling spray to fix.
Pipe a drop of melted chocolate on the base of the head...
... and stick the head on the round part of the hat. Leave to crystallize.
The eyes should have crystallized completely at this stage.
Flip the mould over a sheet of greaseproof paper...
... and release the chocolate eyes from the mould. They should come off easily. The finish should be glossy.
This is what the result should look like.
Here is a closer view of what the eyes should look like.
Refrigerate the chocolate bunny for 15 minutes (or place in the freezer briefly).
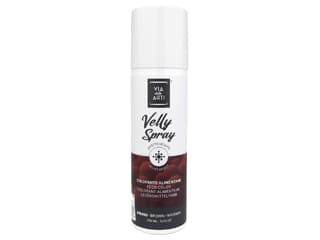
Protect your workbench with several sheets of greaseproof paper. I used a velvet pearl icing spray with a natural chocolate colour for this recipe. Shake the spray until you hear the ball bearings moving inside the bottle...
... and spray the chocolate bunny from a distance of 30cm. The chocolate should be really cold for this operation.
Spray the velvet icing over the whole surface of the chocolate...
... while rotating the chocolate bunny on your workbench.
This is what the result should look like at this stage. When coming into contact with the cold chocolate, the pearl spray turns into tiny drops that set instantly, hence the velvet effect.
On one of the chocolate eyes...
... pipe a drop of melted chocolate on the flat part.
Arrange the eye on the head and use the cooling spray to fix.
Repeat the operation with the second eye...
... and arrange it on the head.
Use the cooling spray to fix the eye. Our gorgeous Easter chocolate bunny is now ready. Store in a cool room until ready to serve. Enjoy this delicious chocolate treat!
Please login to post a review