You can always send us your messages, comments or suggestions.
In one click, store and find all your favourite recipes.
Add this recipe >To make these Chocolate Christmas Stars with Praliné & Caramel, start by preparing the ingredients for the star shells.
Chop the small batch of dark chocolate on a chopping board.
Make sure the chocolate is finely chopped for easier melting.
Melt the larger batch of dark chocolate in the microwave, in 20- to 30-second intervals, stirring every time to avoid burning. The chocolate should reach a maximum temperature of 50°C.
Once the melted chocolate reaches 50°C (maximum), add the chopped chocolate...
...and stir carefully. Allow the chocolate chips to melt in the warm chocolate for a few seconds, then stir with a spatula until the chocolate cools down to 31°C.
This method with adding chopped chocolate facilitates the cooling process.
The chocolate should be fully melted and reach 31°C. If there are still small chunks at this point, gently warm the chocolate surface with a heat gun or hairdryer from a distance of 20-30 cm. Make sure the temperature stays around 31°C.
If you have a large egg tray, it will be useful to hold the mould horizontally.
Cover the egg tray with a kitchen towel. Then place the first half of the star chocolate mold on top.
Pour the tempered dark chocolate (at 31°C) into the cavity.
Ensure the chocolate fills the entire cavity and tilt it from right to left and so on.
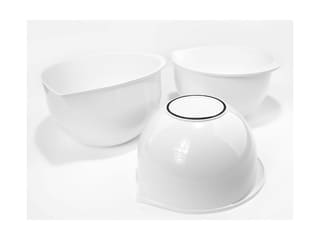
Flip the mold over the mixing bowl containing the tempered dark chocolate and tap the sides with a chocolate spatula to let the excess chocolate flow out.
Scrape the surface of the mold with the chocolate spatula...
...and flip the mold upside down on a sheet of parchment paper. Leave to set for at least 1 hour in a cool room (18°C). This position will create a slight collar at the base of the star, which will be useful when assembling the two halves together later on.
Repeat the operation with the other half of the star mould, filling it with tempered dark chocolate maintained at 31°C.
Tap the sides of the mold with the chocolate spatula to release any air bubbles.
Flip the mold over the bowl, tapping the sides with the spatula to let the excess chocolate flow out.
Then scrape the mold surface again with the chocolate spatula.
Place the mold upside down on the parchment paper and let it set.
Once set, the chocolate should have a uniform colour, with no white spots, indicating the tempering process was successful.
Gently twist the sides of the mould to release the star, being careful not to break it. Alternatively, you can refrigerate the mould for 10-15 minutes (no more) to shrink the chocolate slightly for an easier release. Only use this method if the release is difficult at room temperature.
Flip the mold over on the work surface; the chocolate star should come off easily...
...as shown in the photo.
Repeat with the second cavity.
Set both dark chocolate star halves aside.
Repeat the whole operation with the milk chocolate, except this time the large batch should be melted to a maximum of 45°C.
Add the chopped milk chocolate...
...and stir to melt the chocolate chunks.
Continue stirring to let the chocolate cool down...
...until the chopped chocolate is fully melted.
The ideal working temperature for milk chocolate is 29/30°C. Once it cool down to this temperature, it is tempered and ready to use.
Fill the first half of the star mould with the tempered milk chocolate.
Tilt the mold from left to right to fill the whole cavity.
Flip the mold over the mixing bowl, tapping the sides with the spatula to let the excess chocolate flow out.
Scrape the mold surface with the chocolate spatula and place it upside down on parchment paper. Repeat the operation with the other half of the mold and let set for at least 1 hour in a cool room (18°C).
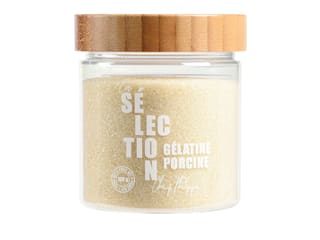
Salted butter caramel with peanuts: Prepare all the ingredients. Mix the powdered gelatin with hydration water (tap or mineral water) and let it hydrate for at least 15 minutes.
Weigh the glucose syrup directly into a saucepan, then add the whipping cream.
Bring the mixture to a boil.
In a second saucepan, make a dry caramel by heating the empty pan and gradually adding some of the sugar in a fine sprinkle.
The sugar will melt and form a syrup.
Stir with a spatula until the syrup begins to slightly change colour.
At this point, add the next batch of sugar...
...and stir carefully. Continue adding the caster sugar this way until fully incorporated.
You should have a golden caramel as shown in the photo. It's essential to cook it slowly and steadily to avoid it darkening too quickly, which would make it bitter.
Once all the sugar is melted and the caramel is formed, add the butter cut into cubes...
...while stirring with the spatula. The caramel should bubble and foam.
After all the butter is incorporated, add the fleur de sel...
...as well as the warm cream and glucose syrup mix.
Bring to a boil...
...and heat the caramel up to 103°C. Use an electronic probe thermometer at this stage.
When the caramel reaches 103°C, remove from the heat and add the hydrated gelatin.
Stir vigorously until the gelatin is fully incorporated, then transfer the salted butter caramel into a mixing bowl.
Chop the unsalted peanuts with a knife, into small and large chunks for texture.
This is important for a crunchy bite.
If using raw peanuts, spread them on a baking sheet and roast them in a fan-assisted oven preheated to 160°C for 10 to 15 minutes.
After roasting, remove the baking sheet from the oven. This step will enhance the flavour of the peanuts. Chop the freshly roasted peanuts, and stir into the warm salted butter caramel and set aside.
Once the milk chocolate has set, gently twist the sides of each mold...
...to release the milk chocolate stars...
...as shown in the photo. If you find the release too difficult, refrigerate for 10-15 minutes to shrink the chocolate slightly, making it easier to release.
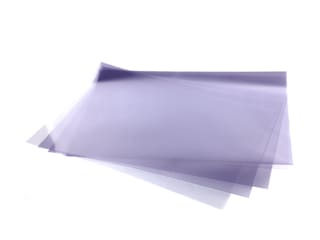
Milk chocolate triangles: Melt a small quantity of milk chocolate to a maximum of 45°C, stir to cool down to 29/30°C, and pour it onto an acetate sheet.
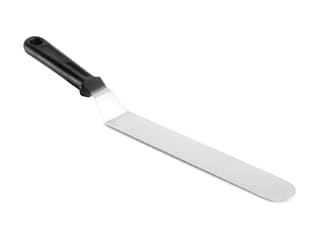
Spread the melted chocolate to a thin layer with a cranked spatula.
Let the chocolate set in a cool room (18°C) for 10 to 15 minutes.
Make an initial cut using a ruler and a cutter.
Create a small cardboard triangle template with a base of 6cm, a height of 1cm and diagonals of approx. 3cm. Cut triangle shapes in the chocolate (you will need 10 per side). We only need triangles for one side of the star, assuming it will be served flat. If you want to serve it upright, you will need to make 20 triangles to decorate both sides.
After cutting the first two triangles, place the cardboard template at the other end of the chocolate strip...
...and trace a line with the ruler, creating a chocolate strip of the correct height (1cm).
Cut out the triangles using the cutter, following the template.
You should have two rows of chocolate triangles.
Cover the chocolate with a sheet of parchment paper...
...and a chopping board or a heavy baking sheet to add weight and prevent the chocolate from warping as it crystallizes. Chill for 10 to 15 minutes.
Praline mousse: Prepare all ingredients.
Pour the white chocolate into a mixing bowl...
...and melt it in the microwave in 20 to 30-second intervals, stirring every time until the temperature reaches 45°C.
Add the hazelnut praline paste to the melted white chocolate...
...and mix carefully with a maryse spatula.
Using the stand mixer whisk attachment, beat the whipping cream until you get the consistency of a whipped cream, but not too firm.
Stop the mixer when you get a soft whipped cream.
Add 1/3 of the whipped cream to the white chocolate and hazelnut praline mix.
Mix using the maryse spatula.
Then add the remaining whipped cream...
...and gently mix with the maryse spatula...
...until the mixture is smooth and homogeneous.
Add the pailleté feuilletine flakes...
...and mix with the spatula.
This praline mousse must be used immediately, before the chocolate crystallizes.
Transfer the mousse into a piping bag. No nozzle is required.
Pipe the praline mousse into one of the milk chocolate star shells.
Even the surface using a mini offset spatula, ensuring the entire star cavity is filled.
Repeat the operation with a dark chocolate shell.
Even the mousse with the cranked spatula. Take extra precautions to avoid breaking the chocolate.
This is what the chocolate should look like.
The caramel should still be soft even once it has cooled down. If needed, you can microwave it for a few seconds, making sure it should not exceed 25°C. Place the caramel in a piping bag (no nozzle).
Pipe the caramel into the two remaining star shells...
...and spread with the offset spatula so the caramel fills all gaps of the cavity...
...as shown in the photo. The chocolate shells are fragile, and the caramel is a bit firm, so you may find it easier to spread it with your fingertips to avoid damaging the chocolate shells.
Heat an empty baking tray in a fan-assisted oven preheated to 100°C. Then remove the sheet from the oven and proceed quickly with following step before the tray cools down.
Take the dark chocolate shell filled with caramel, and quickly slide the rim on the hot baking sheet.
Assemble this shell with the other half (filled with praline mousse)...
...aligning the two halves so the edges stick together. The small collars formed during molding will create a solid seal.
Repeat the operation with the milk chocolate star, by heating the rim of shell filled with caramel...
...and assemble both halves.
Both chocolate starts are now finished. Leave them to crystallize for 10 to 15 minutes at room temperature.
Dark chocolate triangles: As we did earlier with milk chocolate, we're going to make small dark chocolate triangles. If you're only making milk chocolate stars, you should only make milk chocolate triangles, and so on if you're only making dark chocolate stars.
Melt a small quantity of dark chocolate up to a maximum of 50°C, then mix until the temperature goes down to 31°C, and pour over an acetate sheet.
Spread the melted chocolate into a thin layer using a cranked spatula.
Tap the sheet on the work surface to smooth the chocolate. Let the chocolate crystallize at room temperature in a cool room (18°C) for 10 to 15 minutes.
Make a first cut with the ruler and cutter.
Trace a line on the dark chocolate using the template made earlier.
Cut the first triangle. After making a second cut to create a chocolate strip with the correct height...
...cut all the triangles.
Cover the chocolate slab with a sheet of parchment paper...
...and a heavy baking tray or chopping board to prevent the chocolate from warping as it crystallizes. Chill for 10 to 15 minutes.
When the dark chocolate has crystallized, remove the baking sheet and flip everything over on the work surface, so the parchment paper is underneath.
Peel off the acetate sheet and any chocolate scraps...
...to reveal the dark chocolate triangles.
Using a Microplane Classic zester-grater...
...shave the edges of the chocolate triangles...
...to achieve perfectly neat triangles. A smooth result can't be achieved with the template alone, so I recommend using a grater.
Repeat the operation with the milk chocolate. Take it out of the fridge. Peel off the parchment paper and place it back on the chocolate.
Flip everything onto the work surface...
...and remove the acetate sheet.
Detach the milk chocolate triangles. Use the grater along the edges.
Finish: Apply a thin layer of silver powder over the milk chocolate star.
I recommend using a decorating brush.
Pour a bit of melted chocolate into a small paper cone, and pipe two dots of chocolate per triangle, as shown in the photo.
Arrange a chocolate triangle over the dots. (The triangles have been brushed with silver powder beforehand.)
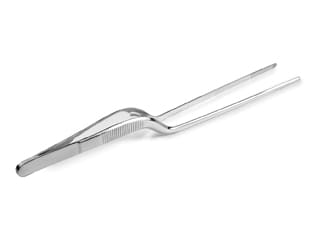
Repeat the operation with a second triangle. You can use precision tweezers for more accuracy.
Continue placing the triangles on the surface of the star...
...until you get this result.
After crystallization, the star can be handled, or even positioned upright.
Repeat the whole process with the dark chocolate star.
Spray gold colouring powder on the dark chocolate triangles...
...as well as the surface of the star, particularly the tips.
Use the small brush to spread the colouring harmoniously.
Pipe two dots of chocolate per triangle, and place a golden chocolate triangle on top.
Continue placing the triangles on the surface of the star...
...making sure they are properly centred...
...as shown in the photo.
The chocolate Christmas stars with praline and caramel are now finished.
Allow the decorations to crystallize for 5 to 10 minutes at room temperature before serving. They should be consumed within 48 hours. Avoid refrigeration to prevent the caramel from hardening or the praline mousse from becoming too firm. Enjoy!
Please login to post a review