You can always send us your messages, comments or suggestions.
In one click, store and find all your favourite recipes.
Add this recipe >Before starting this Easy Croissant and Pain au Chocolat recipe, organise all the necessary ingredients.
Start the day before: Pour the flour in the stand mixer recipient. Place the salt on one side.
Add the honey (melted in the microwave beforehand until liquid).
Pour the castor sugar over the salt.
Add the fresh baker's yeast on the opposite side of the sugar and salt. If you're using dehydrated yeast, reduced quantities by 2.5 times. The salt should not come into direct contact with the yeast. To make sure this doesn't happen, place the yeast at the bottom of the bowl then pour the flour on top.
Add the soft butter...
... and place the bowl in the stand mixer fitted with the flat beater. Over 500 grams of flour, I recommend using the dough hook attachment.
Add the cold milk (straight out of the fridge)...
... and knead at low speed for 10 minutes.
When the dough forms a ball, increase the mixer speed to medium until you have reached the 10 minutes. This operation aims to develop the glutinous network of the dough and is essential.
After beating for 10 minutes, the dough should be soft and homogeneous.
At this stage we need to check whether the glutinous network is sufficient. Stretch the dough carefully with your fingers. It should stretch until you can see through it, without breaking.
Shape the dough into a ball...
... place it on your worktop surface...
... and cover with cling film.
Leave to rise at room temperature for 30 minutes.
Knock the dough back with your palm.
Gather the edges towards the centre...
... then flip the dough and shape into a ball.
Wrap with cling film and refrigerate overnight.
The next day: The dough should have risen only a little since it is enclosed in cling film. Remove the cling film and place the dough on a floured surface.
Roll out the dough into a rectangle, to a length of 45cm and a width of 15cm.
Place the extra dry butter (at room temperature) in the centre of a greaseproof paper sheet.
Fold the parchment over the butter and flatten with your hand.
Fold the opposite side of the parchment over the butter. Press over the paper to firmly mark the folds.
Fold one side over the butter...
... and fold the opposite side, marking the folds in the paper every time.
Flip upside down on your kitchen worktop.
Try to shape the paper parcel to these dimensions: 12 x 15cm.
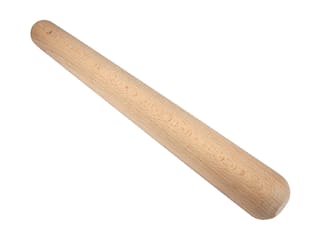
Flatten the butter with the rolling pin until it fills the whole space inside the paper parcel, making sure the angles are filled as well to get an even layer.
The result should be as shown in the photo.
Open the baking parchment and place the butter in the centre of the dough rectangle.
Gently detach the baking parchment. Ideally, we want a border of 1 cm on each side of the butter (see photo).
Fold the bottom part of the dough over the butter.
Fold the top part of the dough over the rest of the butter. Both parts should join perfectly to create a seal in the centre.
Give the dough a quarter-turn (the seal should be vertical now). The butter should not be visible at this stage.
For the double turn: Roll out the pastry lengthwise...
... to a thickness of 5mm. Keep a rectangle shape with four right angle corners.
Fold the top part of the dough over 3 or 4 cm. Make sure the edges are perfectly lined.
Fold the bottom part of the dough and join with the top part.
The top part should be a third smaller than the lower part (the seal should not be centred).
Fold the pastry in half lengthwise.
Crosswise view.
The double turn is done (the seal is on a flat side, not in the fold). Wrap in cling film and refrigerate for 15 minutes.
For the single turn: Place the pastry on a floured surface, with the opening to the right (like a book). Roll out to a rectangle lengthwise, making sure the corners are right angled.
Give the dough a quarter-turn.
Fold the dough into thirds, starting with the right side...
... then the left side. The single turn is now done.
Make sure the edges are perfectly lined. The flaky pastry is now ready.
Wrap in cling film and refrigerate for at least 30 minutes.
Shaping the dough: Using a rolling pin, roll out the pastry lengthwise in a rectangle shape, to a thickness of 5 mm.
The rectangle shape should be regular.
Make sure the thickness doesn't exceed 5 mm.
Try to shape the rectangle to a length of 40 or 45cm...
... and a width of 30cm. This amount of dough should make 6 croissants.
Place the dough rectangle on a baking sheet and cover with cling film. Refrigerate for 20 minutes until firm before cutting the shapes.
Remove the dough out of the fridge and place it on a floured surface.
Trim the right side of the dough rectangle with a ruler. Trim the opposite side and the top as well.
For the croissants: Mark the dough every 11 or 12 cm with a knife to create three rectangles.
Mark the other side of the dough.
Follow the marks and cut the dough with a knife. We now have 3 rectangles.
Cut each rectangle in half in a diagonal to create triangles.
Cut a small notch (2cm) in the centre of the base of each triangle.
Place a dough triangle in front of you, with the tip closest to you.
Stretch the dough a little.
Stretch the width of the triangle as well and fold the base (see photo)...
... and rolling the dough down to the tip of the triangle. Roll gently and carefully.
Roll both ends of each croissant as well to make them thin.
Place the tip of each croissant in contact with the baking sheet underneath to make sure it doesn't lift up while baking. Repeat the operation with all croissants.
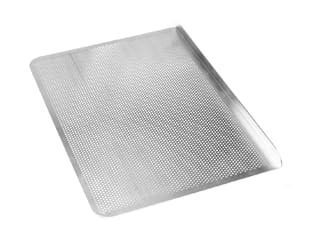
Place the croissants on a perforated baking sheet lined with a sheet of greaseproof paper.
For the pain au chocolat: With a dough rectangle to the same dimensions (length of 40 or 45cm and width of 30cm), trim all the edges.
Cut two strips to a width of 14cm lengthwise.
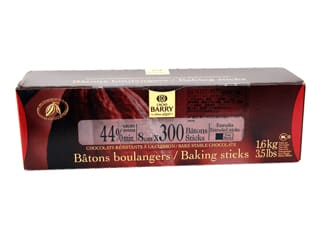
Place the chocolate baking sticks lengthwise, leaving only a few millimetres between them.
Repeat the operation on the second strip and cut the pastry with a knife between the chocolate sticks. The length of the chocolate sticks serves as a guide to define the width of each pain au chocolat.
Place a chocolate baking stick 2 cm from the top of a pastry rectangle. Fold the top part of the pastry over the chocolate stick. Press firmly to seal the pastry...
... and place a second chocolate baking stick (one stick is not enough).
Place your hand flat on the folded pastry and roll.
The pains au chocolat are now rolled. Press on the rolls gently to create a flat base. Place the tip of each pain au chocolat in contact with the baking sheet underneath to make sure it doesn't lift up while baking.
Leave to rise in a proofing chamber at 25°C for 2 hours.
With the quantities listed in this recipe, you will make 4 croissants and 3 pains au chocolat (see the cutting method in video). I made two dough balls for this recipe: one for 6 croissants and one for 8 pains au chocolat.
Once they have risen, glaze the surface of the viennoiseries with egg wash. Apply the glaze with a brush. Make sure you don't collect too much glaze with the brush.
Glaze the surface of the pains au chocolat...
... and the flat parts on the surface of the croissants. Avoid glazing the parts where the pastry has risen.
Bake in a fan-assisted oven preheated at 170°C (gas 3) for about 20 minutes.
When cooked, the pastries should be golden and the pastry should have risen further. Leave to cool before serving.
Enjoy!
These delicious viennoiseries can be prepared well in advance and frozen before or after baking. To freeze before baking: step #68 for the croissants and step #68 for pain au chocolat. You will need to leave them to rise at 25°C for 3 hours (proofing time is longer since the dough needs to defrost first), then glaze and bake. To freeze after baking: store the baked viennoiseries in an airtight container before freezing. You will need to bake them at 150°C (gas 2) for about 10 minutes before serving.
Please login to post a review
thank you so much.