You can always send us your messages, comments or suggestions.
In one click, store and find all your favourite recipes.
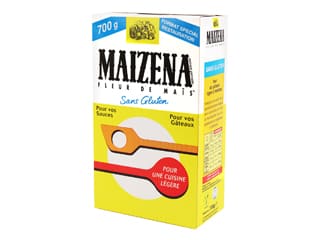
Add this recipe >For the gluten-free rich shortcrust pastry (make the day before): Prepare all the ingredients: butter at room temperature (diced), icing sugar, blended dry ingredients (fleur de sel, corn starch, potato starch, rice flour and almond powder) and the whole eggs at room temperature.
Place the butter (at room temperature) in the stand mixer recipient.
Add the icing sugar.
Fit the stand mixer with the flat beater.
Start beating at low speed then increase gradually. Beat the ingredients until pale.
Stop the mixer and make sure there are no whole chunks of butter.
Scrape the sides of the bowl with a rubber spatula.
Add the eggs at room temperature...
... and mix at low speed for 30 seconds to avoid splashes.
Increase the speed and beat for 2 minutes.
Add 1/3 of the blended dry ingredients and combine.
Stop the mixer and scrape the sides of the bowl.
Add the rest of the dry ingredients.
Beat again, starting at low speed then increasing to maximum.
30 seconds later, the pastry should be ready.
Transfer on a sheet of cling film. At this stage, the pastry is too soft to be handled. I recommend making this recipe the day before.
Wrap it in cling film...
... and store in the fridge overnight.
#For the strawberry confit (make the day before): Organise all the necessary ingredients.
Place the stemmed strawberries and brown sugar into a saucepan.
Add the lemon juice.
Scrape the seeds of half vanilla pod...
... and add to the saucepan (seeds only).
Place the pan over medium heat and let the strawberries candy slowly.
Combine the strawberries and sugar gently without crushing.
Continue until the strawberries are cooked but still whole. The strawberries will release their moisture but will hold together.
After a few minutes, the confit should start forming. The consistency should be syrupy at this stage.
Check one strawberry using a spatula. It should feel soft with a firm centre.
Continue cooking until the strawberries have released all their moisture. Cooking time can vary according to the variety and how ripe the strawberries are.
With good-quality, freshly picked strawberries, this should take about 10 minutes.
Check again until the consistency is very soft.
When pressing on the strawberry, it should feel soft without disintegrating.
Take the pan away from the heat and pass the strawberries through a fine sieve.
Strain without crushing the strawberries. Set aside.
Use a little strawberry juice to blend with the corn starch.
Combine carefully, making sure there are no lumps.
Pour the mix into the remaining syrup.
Place the pan on the stove and cook like pastry cream. Unlike flour, corn starch will bind the preparation without giving it a opaque finish.
Bring to a boil then turn the heat off. Add the strawberries...
... and combine gently.
This strawberry confit with whole candied strawberries makes a delicious addition to cakes.
Transfer the preparation into a large recipient and spread to a thin layer.
Place cling film on the surface of the preparation...
... and reserve in the fridge.
For the lemon and basil cream (make the day before): Organise all the necessary ingredients.
Pour the whole eggs (whisked beforehand) in the lime juice.
Combine the castor sugar, potato starch and almond powder together, then add to the preparation. Add the zest of one lemon.
Combine well with a whisk.
Add the basil leaves.
Mix the preparation with a hand blender...
...until the basil is reduced to small pieces.
Place the bowl in the microwave at maximum power. Cook for one minute...
... then remove from the microwave and whisk. Cook for another 40 seconds.
The eggs should start to coagulate.
Combine vigorously with a whisk.
Cook for a further 25 minutes.
Combine vigorously with a whisk.
Add the butter to the hot cream...
... and combine...
... until the butter is completely incorporated. If the preparation splits, it means the cream is too hot.
You can fix this by mixing with a Bamix hand blender...
... until smooth and homogeneous.
Cover the surface of the cream with cling film and refrigerate.
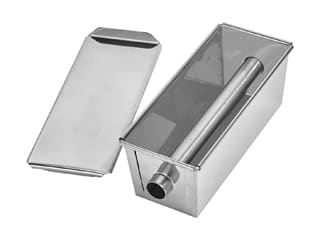
Preparation of the mould (the day before): Get the stainless steel loaf cake mould with cylinder insert. We won't be using the lid for this recipe.
Remove the central tube.
Cut a sheet of greaseproof paper to the dimensions of the mould (bottom and sides).
Place the mould in the centre of the paper and draw the base.
Tilt the mould vertically onto the edge....
... and draw the four sides.
Don't forget to draw the central hole as well.
Repeat with the remaining 3 sides of the mould.
Cut the baking parchment with scissors along the drawing.
Cut the central holes as well.
The result should look like this.
Important Flip the greaseproof paper sheet so the side with drawings is not in contact with the cake.
Fold the paper along the lines.
Brush melted butter over the bottom and sides of the mould.
Line the mould with the greaseproof paper. Thanks to the melted butter, it will easily stick to the sides of the mould.
If the shapes were drawn correctly, the paper should perfectly line the sides of the mould. Make sure there are no air bubbles between the mould and the paper.
This is what the result should look like.
Lining the cake mould with pastry (make the day before) Organise all the necessary ingredients.
Flour a Silpat baking mat with rice flour. It is important to use rice flour to ensure the recipe is gluten-free.
Place two rulers with a thickness of 3mm on each side of the silicone mat.
Sprinkle the pastry with rice flour and place it in the centre of mat.
Roll out the pastry with a rolling pin. The silicone mat will allow you to easily detach the pastry later. If you're making this recipe on a hot day, use two silicone mats: one at the bottom and one on top.
Roll out until the pastry is at the same level as the two rulers.
Trim the edges with a knife.
Place the mould over the pastry...
... and cut along the base with a knife.
Place the pastry rectangle at the bottom of the mould...
... as shown in the photo.
Using a ruler, cut two strips of pastry to a width of 2cm. The rulers we used to roll out the pastry have a width of 2cm. You can also use a graduated ruler.
Use the mould as a guide to cut straight strips...
... to the same length as the mould.
Detach the pastry strips...
... and place around the bottom sides of the mould...
... until perfectly lined.
Make the pastry base and strip joint together.
Place the cylinder tube inside the mould...
... perfectly centred.
Apply melted butter over the whole surface of the tube.
Reserve in the fridge.
For the cake batter (make the day before): Prepare the following ingredients: blend of dry ingredients (rice flour, corn starch, almond powder, baking powder, castor sugar, locust bean gum and lemon zest), grape seed oil, whole eggs (beaten), basil leaves (sliced) and candied yuzu zest.
Instead of a regular food mixer, I recommend using an emulsion processor. Since we're not using gluten, the emulsion will bind the ingredients to create a homogeneous consistency.
Pour the eggs in the processor bowl.
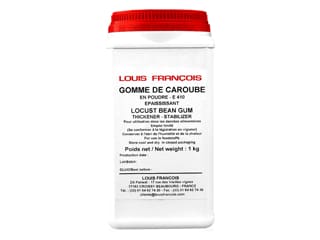
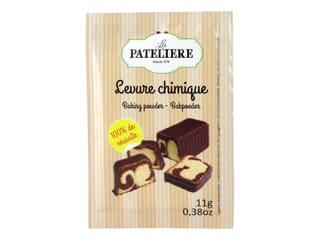
Add the blended dry ingredients: rice flour, corn starch, almond powder, baking powder, castor sugar, locust bean gum (thickener) and lemon zest.
Close the lid and mix until you get an emulsion of the ingredients.
The ingredients should be perfectly incorporated. This should take about 1 minute.
Add the grape seed oil into a thin stream. Grape seed oil has a neutral taste and health benefits, and it won't give your preparation a bad taste. This is the secret to gluten-free cakes with a super moist consistency.
Mix again between 30 seconds and 1 minute until homogeneous.
Stop the mixer and remove the lid.
Check the consistency with a spatula. The small grains are the lemon zest.
Transfer the preparation into a mixing bowl.
Add the candied yuzu zest, cut into cubes.
Add the sliced basil leaves.
Combine gently, using a rubber spatula.
Filling the mould (make the day before): Place the loaf cake mould with pastry base on a kitchen scale.
Fill the bottom of the mould with 200 grams of strawberry confit.
Precise quantities are important to get a cake with balanced flavours.
Pour 500 grams of batter in the mould and even the surface.
The tube should be immersed halfway.
Baking (the day before): Bake in a fan-assisted oven preheated to 160°C (gas 3) for 50 minutes.
When cooked, remove from the oven.
Insert the tip of a knife to check whether the cake is cooked.
The blade should be dry when you take it out.
While it is still hot, grab the insert tube on both ends with a cloth and twist...
... then pull gently toward yourself.
Set aside to cool. At this stage, the cake can be store at room temperature or in the fridge until the next day. You can also make it in advance and store in the freezer.
Slide a knife blade between the greaseproof paper and the mould before releasing the cake. If you store the cake in the fridge, reheat the sides of the mould slightly.
Assembling the cake (on the day): Prepare all the elements.
Scoop the lemon and basil cream into a piping bag. The use of a nozzle is not necessary.
Set aside.
Releasing the cake: The tube is out and the cake should be cold.
Flip the cake upside down on your kitchen worktop.
Gently detach the greaseproof paper.
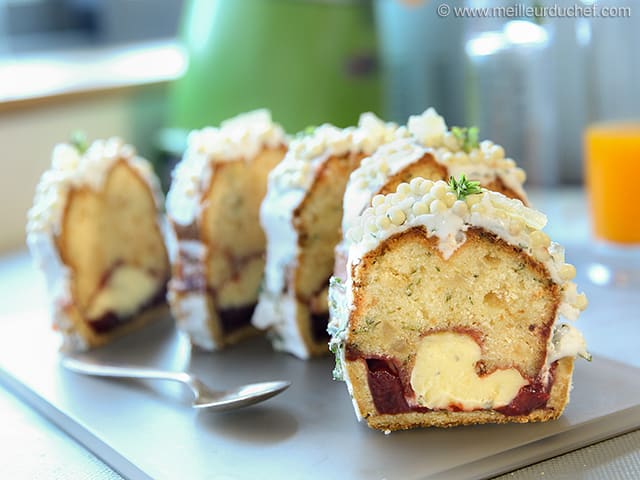
You can clearly see the pastry at the bottom, the layer of strawberry confit in the middle and the cake batter on top.
Transfer the cake on a cooling rack, placed on top of a deep tray.
Cut the tip of the piping bag to obtain a diameter of about 1cm.
Fill the central hole with lemon and basil cream, pressing gently on the piping bag.
Maintain the cake with one hand while you use the other one to fill the insert to prevent it from breaking.
Pipe until the cream almost comes out of the tube.
Rotate the cake...
... and fill the central hole from the other side, while holding it with one hand.
Pipe until the cream almost comes out of the tube.
Even the cream with a small palette knife for a neat finish.
For the royal icing (on the day): Organise all the necessary ingredients.
Place the icing sugar in the stand mixer bowl.
Add the egg whites...
... and the lemon juice which will blanch and crystallize the egg whites.
Start mixing at low speed with the flat beater for 30 seconds then slowly increase the speed.
Royal icing should be whipped enough not to be too runny,
but not excessively not to be too thick. Beating should take 1.5 or 2 minutes.
If necessary, add more icing sugar to thicken or more egg white to liquefy. The icing should have a thread-like consistency.
You can check the consistency with your finger. Coat it with royal icing.
Tap your finger vertically on the edge of the bowl to get rid of the icing excess.
Scrape the underside of your finger against the rim. The icing should coat your finger without dripping.
Add the sliced basil leaves to the icing. Slice the basil at the very last minute to avoid oxidation.
The sugar and lemon in the preparation will prevent the basil from turning brown.
Cover the bowl with cling film and set aside. This icing can keep for a couple of days; simply whip it a little before use until smooth.
Icing the cake (on the day): Place the cake on a rack.
Scoop some royal icing on the surface of the cake.
Spread the icing over the top part...
... and continue spreading the icing directly with your fingers.
Use the icing excess to coat the sides of the cake.
Royal icing is really soft and easy to spread.
Add more icing with the spatula if needed...
... and even the surface. A thin layer is enough, otherwise the icing won't dry or will drip off. I recommend creating a layer with a thickness of 1mm.
Even the surface with a cranked spatula.
Transfer the cake on a baking sheet lined with greaseproof paper...
... and set aside.
For the decoration (immediately after icing): We're going to use white chocolate crispy pearls.
Arrange the white chocolate pearls over the surface of the cake. They will stick easily to the fresh icing.
Use a triangle spatula to prevent the pearls from falling to the side.
Rotate the tray and decorate the other side with pearls.
Make sure only the top surface is coated with pearls (not the sides).
This is a precise operation...
... that requires some time.
We want to leave a few gaps in the chocolate pearls for the candied yuzu zest.
Cut the yuzu peel into small sticks with a length of about 2cm.
Arrange the yuzu peel into the gaps left in the white chocolate pearls, in a random pattern.
Use a generous amount of yuzu peel so that each slice will have some.
Leave the cake to dry for at least 1 hour at room temperature in a well-ventilated room.
The icing will dry into a crust that will help to preserve the moist consistency of the cake.
For the finish (on the day): Place the cake on a serving plate, using a cranked spatula. Ideally, leave the cake to dry overnight and serve the next day.
Using scissors, cut small heads from the dwarf basil. Dwarf bush fine-leaf basil is a different variety than the more common basil we used for the cream and cake batter.
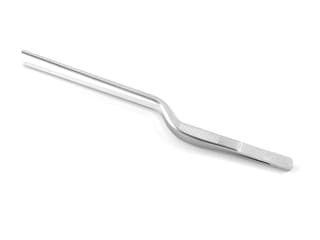
Using decorating tweezers, arrange the small basil heads over the cake.
Cut a lemon into wedges...
... and arrange one on the cake.
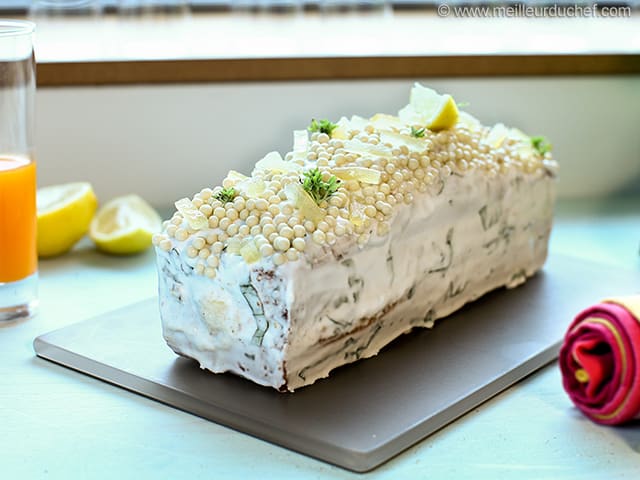
This cake is now ready to serve. Thanks to the use of oil instead of butter, the consistency is super moist. Reserve in the fridge until ready to serve.
People with gluten sensitivity can enjoy this delicious dessert.
People with gluten sensitivity can sometimes be intolerant to lactose as well.
In the rich shortcrust pastry and lemon and basil cream, butter should be replaced with margarine or coconut butter.
Of course, you can also this cake served plain, without icing.
Please login to post a review