You can always send us your messages, comments or suggestions.
In one click, store and find all your favourite recipes.
Add this recipe >Before starting this Chocolate Christmas Trees recipe, make sure you have organised the necessary ingredients for the tempering process.
Melt the chocolate over a bain-marie. When the chocolate reaches a temperature of 40°C, remove from the bain-marie. Let the chocolate cool down to 35°C, stirring at regular intervals. To monitor the temperature, I recommend using a digital or un laser thermometer.
Add 1% of Mycryo cocoa butter, i.e. 3 grams for 300 grams of dark chocolate couverture. The use of a digital kitchen scale is recommended for this operation.
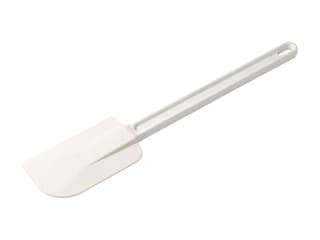
Combine with a rubber spatula until the cocoa butter powder is completely dissolved in the melted chocolate. The use of Mycryo cocoa butter allows for better results: the chocolate is properly set, is shiny, breaks in a neat pattern, melts in the mouth and easily comes away from the mould.
Once the chocolate reaches 33-34°C, it is said to be 'tempered'.
This tempering technique using Mycryo cocoa butter is extremely easy and straightforward.
Pour the chocolate into an Easy Choc cone-shaped silicone mould...
... and fill all the cavities.
Gently tap the mould on your workbench to knock out any air bubbles.
Flip the mould over the bowl with melted chocolate and empty the cavities.
Arrange the mould flat on your kitchen worktop.
... and scrape the surface of the mould with a triangular spatula to remove the chocolate excess.
Leave to cool for about 15 or 20 minutes.
If the tempering is done correctly, the chocolate should crystallize within a few minutes. You can also store it in the freezer for about 10 minutes.
Melt the Cara Crakine in the microwave until soft. Transfer the preparation into a piping bag.
When the chocolate cones are completely crystallized...
... fill them with the Cara Crakine caramel preparation.
Do not fill the cavities completely. Leave a small gap on top to allow you to close the chocolates.
Fill the gaps with tempered chocolate to seal the outer shells.
Repeat the operation for all the cavities...
... and even the surface with the chocolate spatula. Leave to crystallize at room temperature (or refrigerate for 10 minutes).
Release the cones shapes from the silicone mould, pressing gently on the tip. The should be completely set for this operation.
You should have 15 chocolate cones filled with Cara Crakine.
Insert a wooden pick at the base of each chocolate cone, then dip them in the tempered chocolate.
Dip the cones up to the base rim, but make sure they are not completely coated with chocolate.
Let the chocolate excess drip off...
... and bury the cones in chopped caramelised hazelnuts.
(Beforehand, tip a large amount of hazelnut bits in a plastic container to create a thickness of 3 or 4 cm.)
Repeat the same operation with all the chocolate cones...
... and wait for the chocolate to set so the hazelnut bits stick to the cones.
When the chocolate is set, gently remove the cones from the container then carefully remove the wooden picks. Arrange the cones on a baking sheet.
Repeat the same operation with the remaining cones.
You now have 15 chocolate and hazelnut Christmas trees with a delicious caramel filling.
Sprinkle some Codineige (non-melting icing sugar) over the cones.
These cute Christmas trees are a great idea to add an extra festive touch to your table, and a delicious treat for your guests!
They also make the perfect decoration for your Christmas dessert, such as the traditional Bûche de Noël.
Please login to post a review