You can always send us your messages, comments or suggestions.
In one click, store and find all your favourite recipes.
Add this recipe >Before starting this Crunchy Chocolate & Hazelnut Cake recipe, make sure you have organised the necessary ingredients for the Genoese sponge cake.
In a mixing bowl, tip the whole eggs and the castor sugar.
Beat with a whisk and heat the preparation over a bain-marie until it reaches 60°C (the use of a digital thermometer will facilitate the operation). Stir regularly so the eggs don't coagulate.
In a food processor, grind the Marcona almonds...
... into a coarse, regular powder.
In a bowl, place the ground almonds, the icing sugar and the egg yolks...
... and combine with a whisk. Add the egg and sugar preparation, heated to 60°C.
Combine well.
Add the baking powder...
... the flour...
... and the melted butter (it should have cooled down first).
Pour the preparation into 2 round cake tins (diameter 16cm).
Bake at 200°C (gas 6) for 15 minutes.
When cooked, remove from the oven.
Release from the mould onto a cooling rack...
... and cover the Genoese sponge discs with cling film. Reserve in the freezer.
For the hazelnut mousse insert: Organise all the necessary ingredients.
In a saucepan, bring the milk to a boil.
Clarify the eggs and place the yolks in a mixing bowl. Pour the castor sugar in a thin stream.
Blanch by whisking vigorously. Add the crème pâtissière powder. Combine again.
Add the boiling milk.
Combine with a whisk.
Transfer the preparation into the saucepan used to boil the milk and cook like pastry cream...
... until thick.
Transfer the cream into a cold bowl.
Add the praline paste, hazelnut paste, chocolate and Mycryo cocoa butter.
Combine with a whisk until all the ingredients are incorporated and melted.
In a separate recipient, pour the syrup over the egg yolks...
... and combine with an electric whisk for a few minutes...
... until pale and doubled in volume. This preparation is called 'pâte à bombe'.
When the hazelnut pastry cream is down to 30°C, add the pâte à bombe.
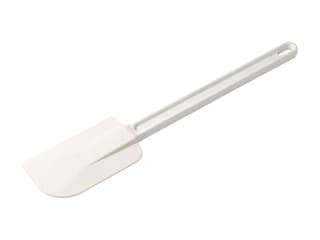
Combine gently with a spatule type maryse.
Add the whipped cream last.
Fold until homogeneous.
Pour the hazelnut mousse into 2 tart rings (diameter 16cm).
Cover with cling film and place in the freezer to set.
For the chocolate mousse: Organise all the necessary ingredients.
Blanch the whole eggs and sugar.
Add the boiling milk. Combine well with a whisk.
Transfer the preparation into the recipient used to boil the milk...
... and cook the preparation 'à la nappe' (i.e. until the consistency is thick enough to coat the back of a spoon), until it reaches 85°C. I recommend using a laser thermometer.
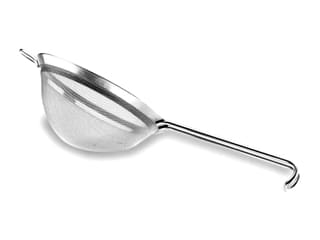
Pass the preparation through a chinois or a fine sieve, over the dark chocolate.
Combine well with a whisk until homogeneous.
Beat the whipping cream until you obtain a whipped cream.
When the chocolate preparation is down to 35°C, add the whipped cream.
Fold gently with a rubber spatula.
Assembling the cake: Place 2 mousse rings (diameter 18cm) on a Silpat baking mat (40 x 30cm) which has been placed on a baking sheet with the same dimensions.
Place one Genoese sponge disc at the bottom of each ring.
Fill with chocolate mousse halfway up. Even the surface.
Remove the frozen hazelnut mousse inserts from the rings.
Arrange one frozen disc in the centre of each mousse ring, on top of the chocolate mousse. Press gently. Cover with chocolate mousse and fill up to the top.
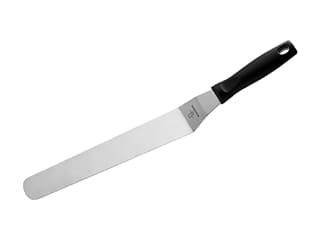
Even the surface with a cranked metallic spatula.
Reserve in the freezer to set. Up to this stage, this recipe can be prepared in advance and stored in the freezer. On the day, you will only need to do the finish and defrost it for a few hours in the fridge.
For the Gianduja icing: (preferably make the day before) Organise all the necessary ingredients.
Hydrate the gelatine with 80 grams of water.
Heat the water, sugar and glucose until the temperature reaches 103°C.
In the meantime, place the condensed milk (both sweetened and unsweetened), the dark chocolate, the Favorites Gianduja chocolate paste and the rehydrated gelatine in a bowl.
When the sugar is at 103°C...
... add the other ingredients to the bowl.
Combine well with a whisk.
Finish mixing with a hand blender. This operation is very important: the ingredients should be perfectly incorporated to obtain a smooth and homogeneous consistency. When using the hand mixer, make sure not to incorporate any air into the preparation. Tilt the mixer, with the head completely immersed in the preparation. Reserve in the fridge for 24 hours.
For the finish: On the day, reheat the preparation to roughly 28°C. Briefly mix the preparation with the hand blender. Tilt the bowl and the blender. The head should be completely immersed in the icing preparation.
Remove the frozen cakes from the mousse rings. Slightly heat the sides of each ring with a blow torch to facilitate the operation.
Place each frozen cake on a cooling rack.
Pour the Gianduja icing, heated to 28°C, on the frozen cake. Pour the icing in one stroke, starting from one side...
... and working all around the cake to coat the sides...
... then finish in the centre. By coming into contact with the frozen cake, the icing will set immediately. It is essential to use the icing when it is at a temperature of 28°C.
Store in the fridge for a few hours to let it defrost slowly.
Decorating the cake: Don't hesitate to customise this dessert with the decorations of your choice! As a suggested presentation...
... we used geometrical shapes made with wrinkled chocolate...
... a small yellow macaron filled with ganache...
... and/or other chocolate decorations with gold flakes.
Store in the fridge until ready to serve. Enjoy!
Please login to post a review