You can always send us your messages, comments or suggestions.
In one click, store and find all your favourite recipes.
Add this recipe >Before starting this Chocolate, Vanilla and Salted Butter Caramel Yule Log recipe, organise the necessary ingredients for the salted butter caramel. Place the glucose syrup in a saucepan. You can melt it in the microwave beforehand to give it a softer consistency.
Add the castor sugar (reserve one tablespoon for the pectin mix)...
... and combine with a spatula. Make sure the sugar is completely melted before it starts to brown and turns into a caramel.
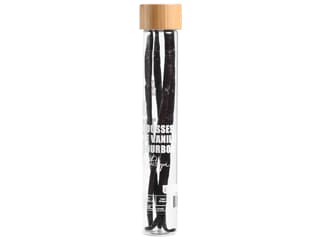
Split the vanilla pod lengthwise and scrape the seeds out.
In a saucepan, place the cream along with the vanilla seeds and pod.
Add the fleur de sel. Quantities listed above are for salted butter. If you're using unsalted butter, use twice the amount of salt.
Combine one tablespoon of sugar (set aside in step #2) with pectin in a small bowl. Set aside.
At this stage, the sugar is cooking slowly over medium heat.
Cut the butter into small chunks to incorporate it in several batches. The caramel might curdle if you add all the butter at once.
The sugar should turn into a syrup at this stage. Stir well to make sure it cooks evenly.
The caramel should start to turn brown. Make sure not to stir it too much, other it will crystallize (sugar molecules will create clusters).
When the caramel is pale blonde, remove the pan from the heat.
Heat the cream with the vanilla and fleur de sel.
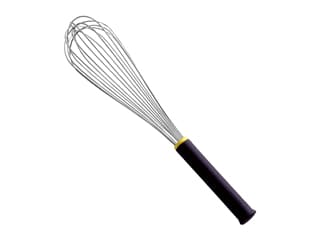
Combine with a whisk to incorporate the vanilla and salt.
When the cream starts boiling, remove the pan from the heat.
Return the caramel onto the stove...
... and continue cooking.
When the caramel is brown (not dark), add the hot cream. Watch out for splashes of boiling caramel.
Combine carefully with a spatula until incorporated.
Cook at a gentle boil for 1 or 2 minutes.
Add the pectin NH coating and castor sugar mix. Pectin here is used to set the water so the caramel doesn't soften once cooled down. Pectin will stabilize the caramel.
Add the butter in three batches. Incorporate the first batch with a whisk...
...
... then add the second batch...
... and the third one, always whisking. When the caramel is smooth and homogeneous, give it a good boil. The caramel should be soft during degustation, but not runny. The temperature should reach 105 or 106°C. I recommend using a digital thermometer with probe.
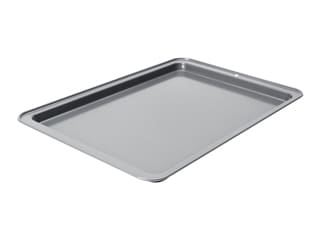
Transfer the caramel into a deep baking sheet to let it cool down.
Place the baking sheet on top of a rack to let air circulate underneath the tray.
Place cling film over the surface of the caramel and leave to cool at room temperature.
For the crème pâtissière (base for diplomat cream): Heat the whole milk in a saucepan.
Split half a vanilla pod in two and scrape the seeds out. Add the vanilla pod and seeds to the milk and combine.
Pour half of the sugar in the milk and combine with a whisk. This will ensure the milk doesn't stick to the bottom of the pan.
Place the egg yolks in a mixing bowl...
... and add the rest of the sugar.
Il is essential to blanch these two ingredients together so the sugar is completely incorporated into the eggs. The more you incorporated the sugar, the smoother the cream will be.
When the preparation is pale and doubled in volume...
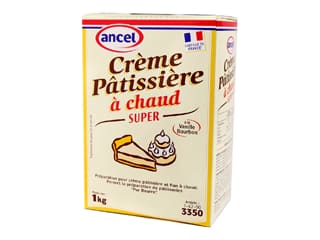
... add the crème pâtissière powder...
... and combine vigorously with a whisk until homogeneous.
When the milk is hot, pour half over the preparation...
... while whisking.
Bring the rest of the milk to a boil.
When the milk starts boiling, add the preparation into a thin stream while whisking. Add the preparation slowly, in several batches.
The cream should thicken almost instantly in the pan.
Once the preparation is fully incorporated, take the pan away from the pan and scrape the sides of the pan.
Coagulation should occur instantly and homogeneously, otherwise lumps will appear. At this stage the cream is smooth and homogeneous but it isn't cooked yet as the starch granules haven't burst.
Return the pan to the heat, then cook the cream for 2 or 3 minutes, whisking constantly. Make sure you go around the pan with the whisk to make sure the cream doesn't stick to the pan. Once the cream starts boiling, cook for a further 1 or 2 minutes.
Crème pâtissière should be fluid and glossy, as shown on the photo. Reduce heat to medium once the cream starts boiling.
Add the butter last.
Combine well with a whisk until incorporated.
Transfer the pastry cream into a food tray. Don't forget to scrape the sides of the pan.
Place cling film on the surface of the cream to prevent the formation of a crust. The cream should cool down as fast as possible, ideally in a freezer, to avoid bacteriological development.
For the chocolate biscuit: Place the cream in a saucepan and bring to a boil. We will make a ganache as a base for the biscuit.
Place the chocolate pistoles in a bowl.
When the cream reaches a boil, pour it over the chocolate and scrape the sides of the pan.
Combine with the whisk.
The chocolate ganache is ready. Set aside.
Place a saucepan filled with water on the heat to create a bain-marie. In a mixing bowl, place the whole eggs and egg yolks...
... and combine with a whisk.
Add the invert sugar (a sugar where solid molecules have been transformed into liquid molecules via overheating and acidification). Invert sugar will give the biscuit an incredible moist texture with no need to steep with syrup. You can replace invert sugar with honey (same quantity), but obviously the biscuit will have a honey flavour.
Combine carefully with the whisk.
Add the glucose syrup, which will serve as a glue in the biscuit. The biscuit will rise during baking and will not collapse afterwards.
Place the bowl over the bain-marie and mix with a whisk.
The temperature shouldn't exceed 60°C, otherwise the eggs will start to coagulate. It is safe to stop at 50/55°C. If you don't have a thermometer, touch the preparation with the tip of your finger and you should feel a stinging sensation due to the heat. Whisk constantly.
The eggs should be pale and foamy when done.
Transfer into the stand mixer recipient...
... and beat until cooled down completely.
This is what the result should look like after beating for a few minutes. (We multiplied quantities by two.)
Pour the chocolate ganache in a separate bowl.
Pour half of the egg preparation (at 30°C) over the chocolate ganache (at 40°C). These temperatures will ensure a perfect incorporation.
Combine carefully with a rubber spatula.
Add the rest of the preparation...
... and fold gently with the spatula, making sure to go right down to the bottom of the bowl.
When almost homogeneous...
... add the flour in one go. The less flour you're using, the quicker you need to incorporate it to avoid lumps.
Fold the preparation with a large rubber spatula, going to the bottom upwards. This operation should be quick.
The chocolate biscuit batter is smooth and homogeneous.
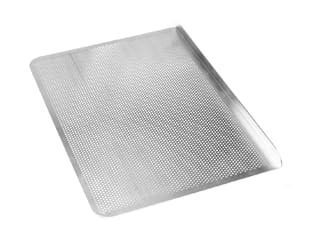
Place a Flexipan Entremets silicone mat 33.5 x 33.5 cm on top of a Silichef XL perforated baking sheet. You can use a rack to stabilize the silicone mat.
Pour the chocolate preparation into the silicone mat...
... and spread into a regular layer over the whole surface using a cranked spatula.
The result should be as shown in the photo.
Cook in a fan-assisted oven at 170°C (gas 3) for 10 to 12 minutes.
When cooked, remove from the oven...
... and sprinkle slightly with castor sugar while the biscuit is hot. This will ensure the biscuit doesn't stick to the greaseproof paper.
Place a sheet of greaseproof paper over the biscuit...
... and flip the mould with a sharp move.
Detach the biscuit from the silicone mat carefully, making sure not to break the angles.
This is what the result should look like. Leave to cool at room temperature.
Once the biscuit has cooled down, cut into two strips: the first one to a length of 25 cm and a width of 6 cm...
... and the second one to a length of 25 cm and a width of 9 cm. The first strip will be used as an insert and the second one will be the base of the yule log.
For the caramelized hazelnuts: Toast the hazelnuts in the oven at 160°C (gas 3) for 15 minutes, then transfer into a coarse mesh sieve and rub to remove the brown skin. It doesn't matter if you can't remove all of them.
The result should be as shown in the photo. You can also use blanched hazelnuts.
In a saucepan, pour the water and castor sugar and bring to a boil.
When you get a syrup...
... pour over the hazelnuts...
... and combine carefully until the hazelnuts are evenly coated with the syrup.
Transfer the hazelnuts on a baking sheet lined with greaseproof paper.
Spread the hazelnuts with a spatula so they don't stick together...
... and caramelize in a fan-assisted oven at 170°C (gas 3) for 15 minutes.
Stir every 5 minutes until the hazelnuts are caramelized. Remove from the oven and set aside to cool.
Take the caramel out of the fridge and transfer into a pouring jug.
Mix the caramel with a hand blender until smooth. It is important to do this operation while the caramel is warm (and not hot) to avoid a runny consistency.
Pour the caramel in a piping bag. The use of a nozzle is not necessary.
For the vanilla diplomat cream: Beat the whipping cream.
Weigh the necessary quantity of pastry cream and transfer into a mixing bowl. Beat with a whisk until smooth.
Stop the beater when you obtain a whipped cream that is still soft.
Add the gelatine (hydrated beforehand then melted in the microwave) to the pastry cream. The gelatine is important to ensure the cream holds together well.
Combine well with a whisk until incorporated.
Add half of the whipped cream and whisk gently.
Add the rest of the whipped cream and whisk gently. Finish mixing with a rubber spatula until homogeneous, making sure to scrape the sides of the bowl.
Transfer the diplomat cream into a piping bag (no nozzle required).
Place 175 grams of caramelized hazelnuts in a pastry bag and crush them with a rolling pin. We don't want something too fine.
This is what the result should look like.
Assembling the insert: You will see on the photos we made two yule logs for this recipe. Pipe two or three laces of diplomat cream at the bottom of a Silikomart yule log mould...
... as shown in the photo.
Even the surface with a spatula and create a gutter shaper in the middle...
... as shown on the photo.
Pipe the caramel (at room temperature) in the gutter.
Sprinkle crushed caramelized hazelnuts over the caramel.
The result should be as shown in the photo.
Place the small chocolate biscuit strip on top. The insert is now done. Reserve in the freezer.
For the crunchy hazelnut praline: Place 25 grams of leftover caramelized hazelnuts in a piping bag and crush them further with a rolling pin until fine.
Pour the melted milk chocolate over the praline paste...
... and combine gently with the rubber spatula.
Add the crêpe dentelle flakes...
... and the crushed hazelnuts...
... and combine with a spatula.
For the dark chocolate mousse: The base for this mousse is a crème anglaise (custard). Organise the necessary ingredients.
In a saucepan, heat the milk and 85 grams of whipping cream.
Place the egg yolks in a mixing bowl.
Add the castor sugar...
... and blanch the preparation for a couple of minutes, using a whisk.
When the milk starts boiling, pour it over the preparation while whisking.
Transfer the preparation into the saucepan used to boil the milk...
... and cook 'à la nappe' (i.e. until the consistency is thick enough to coat the back of a spoon). The temperature shouldn't exceed 82°C to make sure the eggs don't coagulate. This shouldn't take long at all since we're working with small quantities.
Pour the custard over the dark chocolate pistoles...
... and whisk vigorously...
... until homogeneous. The preparation might have a slightly grainy consistency, which is normal.
Beat 300 grams of whipping cream until you obtain a whipped cream. The whipping cream should be cold, with a fat content of 35%.
Make sure you don't overbeat the whipped cream, the consistency should be soft.
Add 1/4 of the whipped cream to the chocolate preparation...
... and combine with a whisk.
When homogeneous; add the preparation to the rest of the whipped cream...
... and combine gently with a whisk.
The dark chocolate mousse is ready.
Transfer into a piping bag (no nozzle required).
Assembling the log: In a separate silicone yule log mould, pipe three or four laces of chocolate mousse at the bottom.
Using a mini cranked spatula, create a volcano shape to remove air bubbles...
... on all four sides of the mould.
Remove the insert from the freezer and release from the mould.
Place the insert in the silicone mould and bury it gently in the chocolate mousse (side with chocolate biscuit facing up).
The result should be as shown in the photo.
Cover with chocolate mousse. You should end up with some leftover mousse.
Place the second biscuit strip over the chocolate mousse.
Press gently on the biscuit with your fingers.
Even surface of the mousse coming up the sides around the biscuit...
... and finish with a thin layer of chocolate mousse on top.
Pour the crunchy hazelnut praline over the chocolate mousse...
... then spread and even the surface with a cranked spatula.
This is what the result should look like this. Reserve in the freezer. Up to this stage, this recipe can be prepared several days in advance. Simply follow the next steps on the day.
For the Gianduja milk chocolate icing: Organise all the necessary ingredients. Unlike mirror icing which needs to be prepared the day before, this icing recipe can be used right away.
Heat the cream in a saucepan.
Add the sugar syrup 30° baumé...
... the glucose syrup (melted in the microwave beforehand until soft) and the gelatine (rehydrated beforehand). Bring to a boil.
Place the chocolate and Gianduja milk chocolate in a mixing bowl.
When the cream starts boiling, pour it over the chocolate.
Combine carefully with the whisk...
... until smooth and homogeneous.
Add the grape seed oil (or any other flavourless oil like sunflower oil). The amount of oil depends on the consistency you wish to obtain.
Add the chopped almonds (toasted in the oven at 150°C for 15 minutes beforehand).
Combine carefully with the whisk.
Place a rack on top of a deep food tray.
Release the log from the mould...
... and transfer onto the rack, well centred.
Pour the icing over the log.
The icing should coat the whole surface; make sure there are no gaps on the sides.
Tap the rack over the tray so the excess icing drips off...
... and leave at room temperature to set. This should take a few minutes.
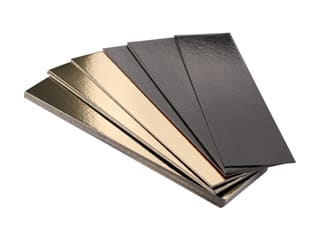
Lift the log carefully with a large cranked spatula and transfer over a yule log cake board.
Place a yule log tip at each end of the log.
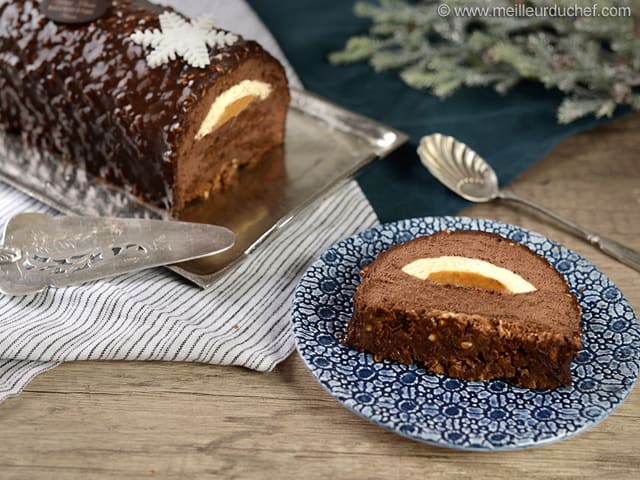
Finish the decoration with a snowflake made of white sugar paste.
Keep the decoration simple for a more elegant result!
Refrigerate until the log is completely defrosted. This should take between 3 and 4 hours. Enjoy this delicious dessert and have a sweet Christmas!
Please login to post a review