You can always send us your messages, comments or suggestions.
In one click, store and find all your favourite recipes.
Add this recipe >To make this Saint-Honoré Christmas yule log recipe, start by preparing all the ingredients for the chocolate crémeux.
Chocolate crémeux (make the day before): Pour the milk into a saucepan...
...along with the whipping cream, and place on the heat.
In a mixing bowl, blanch the egg yolks and caster sugar. It's important to whisk these ingredients thoroughly until you can no longer hear the sugar crystals scraping the bottom of the bowl. The sugar must be completely dissolved. This process takes about 3 to 4 minutes and ensures the smooth cooking of the custard base for the chocolate crémeux we are about to prepare.
When the milk and cream come to a boil, pour half over the blanched mixture...
...while stirring with a whisk.
Bring the remaining milk and cream back to a boil in the saucepan.
Then pour the egg yolk, sugar, milk, and cream mix back into the saucepan with the boiling milk and cream.
Stir continuously with the whisk and bring to a boil.
This technique cooks the custard differently than the traditional "à la nappe" technique. This method works only if the whisking has been done properly (for the egg yolks and sugar mix).
As soon as the mixture boils, remove the saucepan from the heat and whisk quickly to cool and stop the cooking. This step is crucial to avoid ending up with scrambled eggs.
Once the temperature has dropped below 86°C, pour the custard over the dark chocolate previously placed in a pastry bowl.
Let the chocolate sit in the hot custard for a few seconds before gently mixing with the whisk. This allows the heat to melt the chocolate before mixing.
Replace the whisk with a spatula to gently stir the mixture...
...which will darken in colour...
...until the chocolate crémeux is smooth and homogeneous. If there are small particles of cooked egg...
...blend the mixture for 15 to 20 seconds with a hand blender.
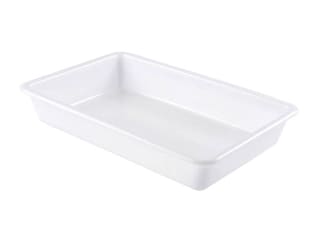
Pour the chocolate crémeux into a food container or a shallow tray for optimal cooling.
Cover the crémeux with a sheet of cling film directly on its surface. Allow it to cool to room temperature before refrigerating. This crémeux must be prepared the day before to ensure it chills properly.
Milk chocolate Chantilly (make the day before): Prepare all the ingredients.
Heat the whipping cream in a saucepan...
...and bring it to a boil.
Pour the boiling cream over the milk chocolate pieces placed in a pastry bowl...
...and whisk together. The chocolate will begin to melt with the heat of the cream and gradually dissolve.
Whisk until the chocolate is completely melted.
Pour this mixture into a food container or shallow tray...
...as shown in the photo.
Cover with cling film directly on the surface. Refrigerate. This preparation must be made the day before.
Reconstituted hazelnut crunch: Prepare all the ingredients.
Place the softened butter in the bowl of a stand mixer. Add the brown sugar...
...as well as the hazelnut powder, preferably raw (this will give a better crunch).
Add the flour...
...and begin mixing with the paddle attachment at moderate speed...
...until a homogeneous crumble texture forms.
Add chopped, toasted hazelnuts...
...and continue mixing at low speed.
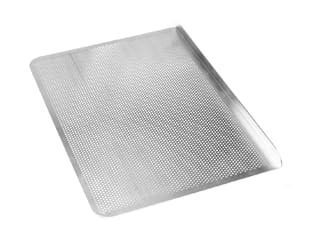
Spread this crumble onto a perforated baking tray lined with a silicone mat.
Break the crumble into small pieces to distribute it evenly on the tray.
Bake the tray in a fan-assisted oven preheated to 160°C for 20 to 25 minutes, depending on your oven.
Halfway through, you should achieve this result.
Note: the photo shows two trays, but this recipe is for a single yule log serving 6 to 8 people.
The crumble should begin to colour lightly.
Remove the tray from the oven and stir the crumble with a whisk to ensure even baking...
...then return the tray to the oven to continue baking.
The crumble is ready when it turns a light golden brown.
The texture and colour should look like this.
Continue mixing with the whisk for a homogeneous colour.
Transfer the crumble into a food container and let it cool to room temperature. For the next steps of the hazelnut crunch, the crumble must be completely cooled.
Craquelin: Prepare all the ingredients.
Place the softened butter and brown sugar into the stand mixer bowl.
Add the flour...
...and start mixing at low speed...
...to ensure the softened butter incorporates well into the brown sugar and flour.
Continue mixing until the dough is smooth and homogeneous.
Transfer the dough onto a sheet of parchment paper and flatten it slightly with the palm of your hand.
Cover the dough with another sheet of parchment paper...
...and roll it out evenly to a thickness of approximately 2mm.
Remove the top sheet of parchment paper.
This is what the result should look like.
Using a round cutter, cut out discs of craquelin, trying to make as many as possible.
Refrigerate the craquelin discs for 1 hour (or freeze for 15 minutes).
Choux pastry: Prepare all the ingredients.
Pour the water into a saucepan and add the salt and caster sugar.
Add the milk...
...and the butter. The butter can be cold or softened; it doesn't matter.
Heat the mix and bring it to a boil, ensuring the butter melts completely.
Once it reaches a boil, add the flour all at once. Turn off the heat at this stage.
Stir rapidly with a whisk to incorporate the flour and to prevent lumps from forming.
Once the flour is fully incorporated...
...switch to a spatula and dry out the dough (called "panade" at this point) by turning the heat back on to medium. Stir until the dough comes away from the sides of the pan.
The dough is ready when it comes away cleanly from the pan.
Transfer the dough into the stand mixer bowl...
...and mix with the paddle attachment on low speed to cool it down before adding the eggs.
When the dough has slightly cooled, below 80°C, incorporate the eggs one by one. If you've cracked all the whole eggs together, add them gradually in small amounts. Mix until the first egg is fully incorporated...
...before adding the next egg.
Then knead again and proceed in this manner until all the eggs are completely incorporated.
The choux pastry is ready.
Scrape the inside of the bowl thoroughly with a flexible spatula to ensure the dough is homogeneous.
Tip: the dough should be flowing and form a ribbon. If your dough is too firm, you can add a bit of warm milk, just enough to achieve a flowing texture. A dough that is too firm will not yield good results. Transfer the choux pastry into a piping bag fitted with a plain pastry tip (7 or 8mm diameter).
Take the craquelin discs out of the fridge or freezer. Place a sheet of parchment paper on top...
...to flip everything over onto the baking sheet...
...and remove the parchment paper now on top (the one that was initially on the bottom and is stuck to the craquelin).
Tap the baking sheet on the work surface to help the craquelin discs release from the rest of the dough.
Detach the discs one by one, keeping them at room temperature if you're about to pipe the choux immediately. Otherwise, store them in the fridge. Any leftover craquelin can be brought back to room temperature, kneaded, rolled out, and reused for a later use.
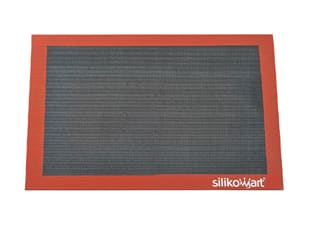
Pipe the choux onto a perforated silicone baking mat. A perforated mat will ensure better results, but you can use a regular silicone mat.
Pipe the choux in a staggered pattern on the baking sheet for optimal rising. The raw choux should be 3cm in diameter.
Place the craquelin discs on top of each choux, positioning them horizontally and centering them well...
...as shown in the photo.
Place the baking sheet into a ventilated oven preheated to 170°C and bake for 25 to 30 minutes. This baking time may vary depending on the oven. By the end of the baking, this is what the result should look like: the craquelin discs being slightly larger than the choux will allow them to wrap around the choux during baking.
Remove the baking sheet from the oven and let it cool at room temperature.
Reconstituted hazelnut crunch (continued): Melt the milk chocolate in the microwave in 20 to 30-second intervals, stirring every time to prevent burning. It should be fully melted and around 40°C. Then add the hazelnut praline...
...and mix thoroughly.
Transfer the cooled crumble into a large bowl.
Add the milk chocolate and hazelnut praline mix...
...and mix with a flexible spatula.
This is what the result should look like.
The hazelnut crunch is ready to use. If you don't use crumble that has been properly cooled, you'll end up with a base that is too hard.
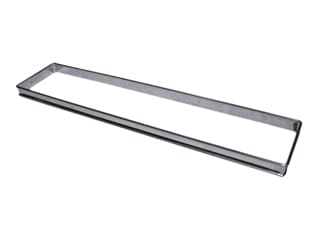
Take a rectangular tart frame (35 x 11 cm) and place it on a baking sheet lined with a silicone mat. Add 450 g of the reconstituted hazelnut crunch at the bottom of the stainless steel frame. Reserve some crunch for the final decoration on a small plate, and keep it refrigerated.
Spread the reconstituted hazelnut crunch evenly with the back of a fork to achieve a consistent thickness...
...and smooth it well, making sure the layer is uniform.
Once the hazelnut crunch is compact, remove the tart frame. You can also remove it later. The frame can be easily removed right away, but if the preparation crystallizes in the fridge, you'll need to use a knife to loosen the base and remove the frame. Place in the fridge.
Chocolate strings: Temper the dark chocolate using your preferred method (with Mycryo cocoa butter, traditional or seeding method). Take an acetate sheet (40 x 30cm). Pour a strip of tempered dark chocolate along the top of the sheet...
...and, using a decorative comb, draw lines of chocolate strings by running the comb through the chocolate several times to cover the entire sheet.
Make sure you pull the chocolate downwards to create parallel lines between each junction of the comb. You can also use a polyethylene sheet.
This is what the result should look like.
Leave the chocolate to crystallize at room temperature in a cool room (18°C), but not in the fridge, until the chocolate feels dry to the touch.
Place a sheet of parchment paper on top...
...and flip everything onto a baking tray. Set aside at room temperature until fully crystallized.
Assembling the yule log: Take the chocolate crémeux out of the fridge. It is ready to use. Transfer it into a piping bag fitted with a plain tip (8 to 10mm diameter).
Remove the hazelnut crunch base from the fridge. Slide a knife blade between the stainless steel frame and the crunch base to detach it and facilitate the release.
Spread a thin lace of chocolate crémeux on both sides along the entire length of the log base. Set aside.
Filling the choux: Place a small star-shaped piping tip (5 to 6mm) between the wires of a cooling rack, as shown in the photo.
Then pierce the bottom of a choux puff by pushing it onto the star tip...
...and fill the inside of the choux with chocolate crémeux.
As you fill each choux, position it over the strip of crémeux on the biscuit base. This length should allow you to create a row of 7 choux. Depending on their size, you may fit six to eight. This is why the recipe is supposed to serve 6 to 8, as a serving usually corresponds to the width of one choux.
Repeat the process for all the choux, positioning them side by side.
After completing the first row, align the choux so they are perfectly aligned.
Do the same for the second row of choux. The raw choux had a diameter of 3cm, and after baking, they measure about 4 to 4.5cm.
Continue the row of choux along the strip of crémeux, which acts as a glue.
Ensure that the choux are placed upright and aligned...
...as shown in the photo.
Feel free to adjust them for a perfect result.
Pipe the remaining chocolate crémeux in a thick layer in the center of the yule log, between the two rows of choux.
This is what the result should look like.
Gently push the choux towards the center to ensure they adhere well to the crémeux, which will consolidate the log. This step is important if you need to transport the log.
Milk chocolate Chantilly (continued): Remove the chocolate mixture from the fridge and pour it into the stand mixer bowl. As seen in the photo, it remains relatively liquid even after chilling, which is completely normal.
Whip the mixture using the whisk attachment, as you would a classic chantilly...
...until it thickens and gains texture.
Gradually, you can observe the trails of the whisk on the surface of the chantilly.
The finished milk chocolate chantilly should hold its shape. Be careful not to overwhip, as it could turn into butter, resulting in a texture that is too firm and not smooth.
Fit a piping bag with a Saint-Honoré nozzle.
Transfer the milk chocolate Chantilly...
...into the piping bag.
Finish: Sift Codineige sugar over the two rows of choux using a small sieve.
Codineige sugar is a starch-based sugar that resists humidity, unlike powdered sugar, which tends to melt in humid environments.
Pipe the milk chocolate chantilly in a zigzag pattern down the center, directly over the chocolate crémeux. Start piping from one end of the log...
...and continue in one motion to the other end, ensuring a harmonious result...
...as shown in the photo.
Take the hazelnut crunch prepared earlier in step 95 and chop it into small pieces using a knife on a cutting board.
Sprinkle the chopped hazelnut crunch like a crumble over the surface of the log, over the milk chocolate chantilly.
Finally, place one last choux, previously dusted with Codineige sugar, at the center of the log, over the Chantilly. A total of 15 choux will be needed for one log.
Take the acetate sheet with chocolate strings. Ensure they are fully crystallized. Peel off the sheet.
Using a knife, trim one end of the chocolate strings for a neat, even finish...
...and do the same for the other end. The chocolate strings should have roughly the same length.
Carefully select a few chocolate strings (the cleanest and sturdiest ones)...
...and place them carefully over the surface of the log...
...arranging them in a crisscross pattern for an elegant finish.
The Saint-Honoré Christmas Yule Log is now decorated and ready to serve. It doesn't require defrosting as it hasn't been frozen.
Arrange the yule log on a serving platter and refrigerate until ready to serve. Enjoy!
Please login to post a review