You can always send us your messages, comments or suggestions.
In one click, store and find all your favourite recipes.
Add this recipe >Before starting this Strawberry Cake recipe, make sure you have organised all the necessary ingredients.
For the biscuit: Separate the egg whites from the yolks...
... and beat the egg whites...
... while adding the sugar into a thin stream.
Stop beating when stiff. This operation should take a good 5 minutes. Set aside.
Beat the egg yolks.
Add the flour...
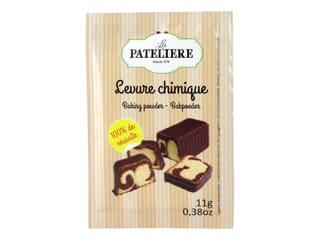
... baking powder...
... and 1/4 of the meringue.
Combine vigorously with a whisk.
Add the rest of the meringue and combine gently.
Grease a charlotte mould. I recommend using a cooking spray: easy to use and ensures a perfect release from the mould.
Pour the preparation into the charlotte mould...
... and even the surface with a spatula.
Bake in a preheated oven at 170°C (gas 3)...
... for 25-30 minutes. When cooked, remove from the oven...
... then release from the mould onto a cooling rack. Let cool.
For the cream: Organise all the necessary ingredients.
Split the vanilla pods lengthwise and scrape the seeds out. Bring half of the milk to a boil, together with the sugar and the vanilla pods and seeds.
Add the potato starch, egg yolks...
... and the remaining milk.
When the milk starts boiling...
... pour over the egg and potato starch mixture. Combine well with a whisk.
Transfer the preparation into the saucepan used to boil the milk...
... and cook for a few minutes over medium heat, stirring constantly...
... until thick.
Add the butter (cut into cubes) into the hot cream and combine until fully incorporated.
Spread the cream on a baking sheet then place a sheet of cling film in direct contact with the cream. Let cool.
Wash and hull the strawberries.
Cut them into small pieces. Reserve the best looking strawberries, about a dozen, for decorating the cake.
Beat the whipping cream until you obtain a whipped cream...
... and add the icing sugar towards the end of the beating process.
When the cream is at room temperature, tip it into a separate recipient.
Beat in the stand mixer to avoid lumps.
Add the rest of the sweetened whipped cream...
... and combine gently with a rubber spatula.
Add the strawberry pieces and combine gently.
Assemble two mousse rings (diameter 16cm) together, using adhesive tape.
For the syrup: Blend together the cane sugar syrup, rum and lemon juice. Combine well.
Cut the biscuit to the same diameter as the ring. Discards the scraps.
Using a serrated knife, slice the biscuit crosswise. Start by cutting a slice to a thickness of 1.5cm...
... then steep with a generous amount of syrup.
Place the biscuit slice inside the ring, then cover with 1/3 of the cream preparation.
Spread with the back of a spoon.
Cut a second slice of biscuit...
... and place on top of the cream.
Steep the biscuit with syrup.
Spread another 1/3 of cream on top. Repeat one last time, until you have used all of the cream and biscuit. According to how thick your biscuit is, you might end up with a slice left over. You may store it (or freeze it) for a later use.
Regardless, you should end up with a slice of biscuit on top.
Don't forget to steep the biscuit with the remaining syrup. Refrigerate overnight. Ideally, you should end up with 7 tiers: 4 biscuit disks + 3 layers of cream.
The following day: Slightly heat up the mousse ring with a blowtorch...
... then remove gently...
... sliding it upwards. Reserve in the fridge.
For the chocolate decoration: Temper the chocolate, following our easy technique with Mycryo. When tempered, pour the chocolate over a chocolate transfer sheet which has been cut to the height of the cake beforehand.
Spread with a cranked spatula into a thin layer, about 2mm thick.
Leave to set. If the tempering was done correctly, the chocolate should crystallize within a few minutes. When partially crystallized...
... cut the strip into even rectangles to a width of about 2.5 or 3cm, using a knife. I used a small cardboard rectangle as a guide.
Set aside until fully crystallized. If necessary, refrigerate for 5 or 10 minutes.
When fully crystallized, flip the chocolate strip onto the kitchen worktop...
... and gently lift the transfer sheet. The pattern should now be printed on the chocolate and the chocolate should be glossy.
Each rectangle should come off easily. Set aside.
For the finish: Melt the glaze over very low heat.
If you find it is too thick, add a couple of tablespoons of water. Whisk to avoid lumps.
One by one, dip the whole strawberries in the melted glaze.
Let the excess drip off, then place the strawberries vertically on a Silpat baking mat. Set aside. (For an easier operation, I recommend using two wooden picks.)
For the meringue: Pour the egg whites in the stand mixer recipient. Add the icing sugar.
Beat until you obtain a meringue...
... with a firm consistency.
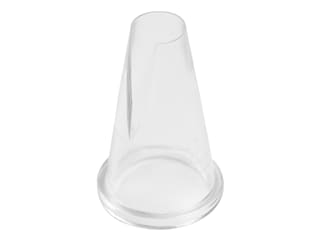
Transfer the meringue into a piping bag fitted with a Saint-Honoré nozzle.
Pipe two layers of meringue on top of the cake.
I recommend piping 2 layers to obtain a nice, foamy effect.
Place a few glazed strawberries around the meringue, and in the centre.
Arrange the patterned chocolate rectangles around the cake, in a vertical manner, overlapping a bit. Slightly spray some silver colouring around the cake. Reserve in the fridge until ready to serve.
Enjoy!
Please login to post a review