You can always send us your messages, comments or suggestions.
In one click, store and find all your favourite recipes.
Add this recipe >Before starting this Eddie Chocolate Bunny recipe, temper the white chocolate. You can follow three different techniques for the tempering process: the traditional technique, the method using Mycryo cocoa butter or the seeding method.
Melt the white chocolate in a bain-marie or in the microwave, stirring every 20 or 30 seconds to make sure the chocolate doesn't burn. The temperature shouldn't exceed 45°C (the use of a laser thermometer is recommended for this operation).
Stir constantly with a rubber spatula...
... until the temperature goes down to 29/30°C.
Transfer the tempered white chocolate into a decorating bag...
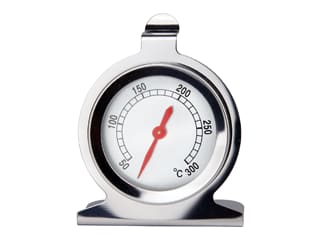
... and close the top of the bag. Keep the chocolate in a warm environment between 28 and 30°C, otherwise in an oven preheated to 30°C. I recommend using an oven thermometer to monitor the temperature.
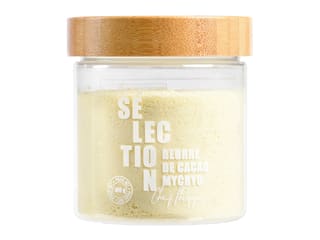
I used the technique with Mycryo cocoa butter to temper the milk chocolate.
Melt the milk chocolate in the microwave, stirring every 20 or 30 seconds to make sure the chocolate doesn't burn...
... until the chocolate has completely melted and the temperature reaches 45°C maximum.
Stir constantly until the temperature goes down to 35°C, then add the Mycryo cocoa butter (1% of the total weight of chocolate).
Combine carefully with a rubber spatula to incorporate the Mycryo cocoa butter.
Continue stirring...
...until the temperature goes down to 29°C. The chocolate is tempered and must be used immediately.
Transfer the tempered milk chocolate into a piping bag...
... and cut the tip of the bag with scissors to create a small hole.
Pipe a small drop of milk chocolate at the bottom of the eye cavity of the 3D Eddie chocolate bunny mould. I recommend using a decorating bag for a more precise operation. Make sure the chocolate doesn't overflow from the cavity.
Leave to crystallize at room temperature.
When the milk chocolate has crystallized, fill the rest of the eye cavity with tempered white chocolate using a decorating bag.
The result should be as shown in the photo. The surface of the chocolate might not be perfectly smooth but the important thing is to fill the whole cavity.
Repeat the operation with the teeth cavities and let the white chocolate crystallize at room temperature.
Fill the feet cavities with tempered milk chocolate. For the feet we don't want an empty chocolate shell but a filled chocolate piece. Fill one cavity up to the top.
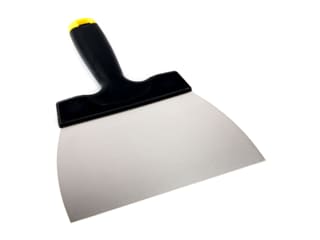
Fill the second cavity and tap the sides of the mould with a chocolate spatula to get rid of any air bubbles. Leave to crystallize. If the chocolate is overflowing from the cavities, you will need to scrape the surface with the spatula later on to get rid of the chocolate excess.
Fill the ear cavities with milk chocolate...
... as shown in the photo.
Tap the mould with the spatula to knock out any air bubbles...
... and leave to crystallize.
Fill the tail cavity with tempered white chocolate.
I used an egg carton to keep the mould stable and flat. Leave to crystallize.
This is what the result should look like.
Fill the main cavity with tempered milk chocolate.
If for some reason you don't have enough chocolate to fill the cavity completely, rotate the mould in your hands so the chocolate reaches the rim of the cavity.
Flip the mould over the bowl and tap with the spatula to get rid of the chocolate excess.
Scrape the surface with the spatula and place the mould on a baking sheet lined with greaseproof paper.
Fill the other half with milk chocolate...
... and rotate the mould in your hands so the chocolate reaches the rim of the cavity if you don't have enough chocolate to fill the cavity completely.
Flip the mould over the bowl and tap with the spatula to get rid of the chocolate excess.
Scrape the surface with the spatula and place the mould on the greaseproof paper.
Leave to crystallize.
All the chocolate elements have now crystallized completely.
We're ready to release the chocolate shapes. Start with the feet.
Slightly twist the mould to release the chocolate feet. They should come off easily, otherwise this is a sign the chocolate was not tempered correctly.
Release the main body halves, giving the mould a gentle twist motion.
All the chocolate elements should have a glossy finish.
Place a baking sheet in the oven preheated to 100°C (gas 1/4) for a few minutes. When the tray is hot, place it on your workbench and use it to melt the rim of one egg half. Make sure the temperature of the baking sheet doesn't exceed 60 or 70°C. The rim of the chocolate egg will melt a little.
Repeat the operation with the second egg half...
... and assemble both parts together, as shown in the photo.
Arrange the chocolate egg on a small stainless steel ring to keep it stable. Leave to crystallize.
Pipe a drop of milk chocolate on top of both feet.
Arrange the whole egg over both feet.
Use the cooling spray at the base of the chocolate egg to fix all elements together.
Pipe a lace of milk chocolate at the base of one ear.
Arrange the ear over the egg and use the cooling spray to fix.
Pipe a lace of milk chocolate at the base of the second ear...
... and arrange the ear over the head. Use the cooling spray to fix.
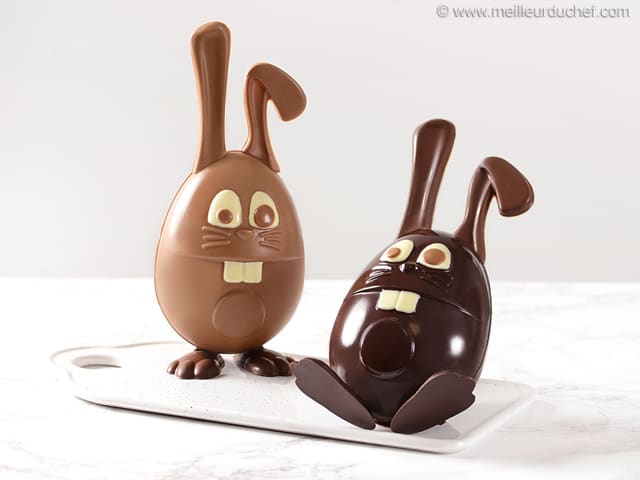
Our gorgeous Eddie chocolate bunny is now ready.
You can also use dark chocolate to make this Easter bunny. The tempering method is identical. When all the chocolate elements have crystallized...
... pour a second layer of tempered dark chocolate to make sure it doesn't break when released from the mould.
Flip the mould over the bowl and tap with the spatula to get rid of the chocolate excess.
Repeat the same operation with the second egg cavity...
... and pour a second layer of tempered dark chocolate.
Flip the mould over the bowl and tap with the spatula to get rid of the chocolate excess.
Place the moulds back on the greaseproof paper and leave to crystallize.
Scrape the surface of the mould with the spatula to get rid of any chocolate excess.
Release the first egg half...
... and give the mould a gentle twist if needed. If the tempering was done correctly, the chocolate shapes should come off easily.
The chocolate piece should be glossy!
Repeat the operation with the other egg half.
Repeat steps 44 to 46 to assemble both parts together, using a hot baking sheet. Arrange the chocolate egg on a small stainless steel ring to keep it stable. Leave to crystallize.
In the dark chocolate version, I placed the feet differently so that the bunny is in a tilted position. Place the tilted chocolate egg on the hot baking sheet to create a flat base on the back.
Arrange the bunny on a sheet of greaseproof paper and leave to crystallize.
Pipe a drop of dark chocolate over each foot...
... and stick one feet on the chocolate egg. Use the cooling spray to fix.
Repeat the operation with the second foot. Pipe a drop of melted chocolate...
... and stick the second foot on the egg. Use the cooling spray to fix.
This dark chocolate bunny seating on its back is a funny option too.
Stick the chocolate ears on the head. You can make the ears using a different chocolate colour!
Pipe a lace at the base of one ear...
... then arrange on the head and use the cooling spray to fix.
Repeat the operation with the second ear. Pipe a lace of melted chocolate...
... and arrange the ear over the head. Use the cooling spray to fix. Our gorgeous Eddie chocolate bunnies are now ready. Store in a cool room until ready to serve. Enjoy this delicious chocolate treat!
Please login to post a review